Showing posts with label Yeast Bread. Show all posts

Saturday, March 2, 2013

Wild Rice and Onion Bread

Last year I regularly made homemade bread from Peter Reinhart's The Bread Baker's Apprentice. I moved away, taking the book with me, my mom took over, buying her own book: Peter Reinhart's Artisan Breads Every Day. Now my family only eats homemade bread, alternating between sourdough (to keep the starter going) and other hearth breads.

The new book was sitting out on the counter, open to a page for Wild Rice and Onion Bread. It sounded good, and the first few sentences in the description had me hooked.

The bread takes 2 days. On the first day you combine all ingredients and knead the dough. Day 2 you shape and bake the bread. I prefer this as It only takes 2.5 hours on day 2 to prep and bake the dough. I can bake it in the morning and enjoy fresh bread all day. (Some 1 day breads take so long to make that I don't get a chance to eat them until dinnertime, and the next morning they have already begun to go stale.)

Ingredients:
6 c bread flour (I used 4 c white and 2 c whole wheat)
2 1/4 t salt
2 T instant yeast
1 c cooked wild rice or another grain
1/4 c brown sugar
1 1/2 c lukewarm water
1/2 c lukewarm milk
1/4 c dried onions OR 2 c fresh, diced
*egg white
*1 T water
**fresh or dried herbs of your choosing: parsley, rosemary, thyme, dill, tarragon, sage, cracked pepper

*optional egg wash
**optional

Day 1:
Cook 1 c rice. I used brown rice because we already had some made.
Mixing can be done by hand or with a mixer; I used a mixer. 
Warm milk + water in a pan until ~95 F/35 C. Combine all ingredients in mixer bowl and mix with paddle attachment on slow/stir for 1 minute. Switch to dough hook. Increase speed to slow/medium for 4 minutes. Dump the dough onto a lightly floured counter and knead for 2-3 minutes. You want the dough to be tacky but not sticky--add more water or flour as needed to achieve this texture.

Transfer dough into an oiled bowl and cover with plastic wrap. Refrigerate overnight.
End of Day 1
Beginning of Day 2
Shaped and ready to rise
Day 2:
Prep pan(s) with parchment paper. Remove the dough from the fridge and immediately shape. Shape is up to you. I like to make boules, and today opted for 1 boule + several smaller rolls. To make rolls, cut equal-sized pieces of dough, form a cup with your hand, and roll the dough around on the counter until it is round. For the boule, keeping tension, fold the edges of the dough in, beginning with top and bottom, left and right. Flip over and place on baking sheet.
When all the dough is shaped, spray with oil and cover with plastic wrap. Let this rise 1 1/2-2 hours. I like to begin preheating the oven after 1 1/2 hours, so the dough can bake on time.
Preheat oven to 350 F. Brush with egg wash and score the dough if you like, then bake 20-25 mins for rolls or 45-55 minutes for loaves. Rotate halfway through baking to ensure the bread browns evenly. Remove when the crust is golden brown.
Let cool at least 20 minutes-1 hour before eating.

The only change I would make to this recipe is to use a baking stone instead of a pan. After 25 minutes (the time it took for the rolls to bake), the bottoms were very brown--almost burnt. I baked the boule for 10 minutes longer and the bottom was also too dark.

Wednesday, July 4, 2012

Pain à l’Ancienne

This was the easiest recipe I've made from Peter Reinhart's book yet. It does take 2 days to make, but required no kneading and produces a fantastic bread as long as you are careful not to handle the dough too roughly, causing it to lose precious trapped air.

This makes 6 baguettes.

Ingredients:
6 c unbleached bread flour
1 1/4 t salt
1 3/4 t yeast
*2 1/4 c + 2 T to 3 c ice cold water
semolina flour for dusting

*to ensure the water is ice cold, place it in the refrigerator with ice cubes. Remove the ice immediately before using.

The texture of this dough is very sticky, so it is best if you mix with an electric mixer or food processor. On the first day, combine all the ingredients, using whatever method you choose. Oil a large bowl, transfer the dough, cover with plastic wrap and refrigerate overnight.

The next day, remove the bowl from the fridge and let sit until room temperature and the dough has doubled in size, 2-3 hrs, or more. When this has happened, carefully dump or lift with wet hands, the dough out onto a very floured surface. Flour your hands and shape the dough into a rectangle, 8''x 6''. Mine fell into a shape larger than this, and for fear of handling it too much, I left it alone.

1st four baguettes done, two more still baking
Have a bowl of water sitting on the side, to dip your pastry scraper in. Using this tool, cut the dough in half, and cut each of these pieces in thirds. Flip two baking sheets over and line them with parchment paper covered in semolina flour. Take 3 pieces of dough and put them on the baking sheets, stretching from the ends when you do this so they are the length of the pan. The dough will be very elastic and stretch easily. Let rest 5 minutes, then stretch out again if necessary. Score the dough diagonally if you choose, but this will be difficult since the dough is so sticky.

While the dough is resting preheat the oven to 500 F, with 1 rack in the bottom with a baking stone and 1 rack near the top with a cast iron pan for steaming. If you don't have a baking stone you can bake directly on the sheet. When you transfer to the baking stone, keep the bread on the parchment paper. Have a misting spray bottle with water handy, and 1 cup of boiled water ready to pour into the cast iron pan.

When the oven is ready, put the breads on the stone, pour the water into the cast iron pan and close the door. After 30 seconds mist the oven walls and close the door. Repeat 2 more times at 30 second intervals. After the 3rd spray, lower the oven to 450 F and remove the steam pan. Since these breads are small, they will only take about 8-15 more minutes to bake. They are done when they are golden brown on top.

Immediately transfer to a cooling rack, bake the rest of the dough if it didn't fit, and serve after 30 minutes of cooling.
Detail of the huge air pockets in the dough; it had a great texture and crust.

Sourdough Potato, Cheddar, and Chive Torpedoes

This is the first sourdough bread I've made, and with how perfectly it came out I'm tempted to only make sourdough bread from now on! The crust was thick and crunchy--perfectly complementary to the light and fluffy inside. It had the characteristic sourdough flavor, which will continue to develop as I grow my starter over time, and the chive and cheddar were a wonderful combination in the bread. I also believe the potato added to the lightness and flavor to this bread, and I am curious to try other more traditional sourdough breads to compare.

The bread itself only took 1 day to make, but it took me 5 days to prepare the starter. Four days to prep the seed culture, and 1 day to make the barm, or sourdough starter, which uses seed starter. Once you make the barm, it is refrigerated overnight, then used the next morning in this recipe. Here is a link to a recipe for a simple sourdough starter, since Peter Reinhart's is fairly descriptive and a lot to include here.

Ingredients:
4 c unbleached bread flour
2 small potatoes (~8oz), finely chopped, boiled in 3 c water
1/2 to 1 c potato water, from above
1 1/2 c barm
2 t yeast
2 t salt
6 thin slices sharp cheddar cheese (4 oz)
1/4 c finely chopped chives
Semolina or cornmeal for dusting

Remove the barm from the fridge 1 hr before you are ready to start. At the same time, boil the potatoes in water, and let sit until warm.

In a large bowl mix the barm with 2 c flour, 1/2 c water, the potatoes, and yeast, and let sit 30 minutes.

Add the rest of the flour, salt, and add water as needed as you mix the dough until it forms a ball. Knead for ~6 minutes until everything is evenly distributed. Add the chives and continue kneading for 2 minutes until mixed thoroughly. I kneaded mine an extra 2 minutes until I was satisfied with the texture.

Coat in oil and let rest in a bowl covered in plastic wrap for 90 minutes, until doubled.

After the dough has risen, dump out onto a floured surface and cut into 2 halves. Flatten into 6''x8'' rectangles and lay 3 cheese slices on each, leaving a 1'' border around. Roll up the dough, keeping surface tension as you roll, and gently pinching the ends closed, making sure the push trapped air out when you pinch.

Place the loaves onto a baking sheet lined with parchment paper, dusted with cornmeal or semolina flour. Spray with oil and cover in plastic wrap. Let rise ~1 hr.

When the loaves are almost done rising, prep the oven for hearth baking: 500 F, with steam pan and baking stone on a rack below. Score the loaves diagonally, cutting through to a layer of cheese.

When the oven is preheated, place the bread in the oven on the stone or on the pan, and you can leave it on the parchment paper if you choose. This will protect the bottoms from burning, I have found.

Fill the steam pan with 1 c boiled water and close the door. Open after 30 s and mist the oven. Repeat misting 2 more times, then lower the oven to 450 F and set the timer for 35 minutes. Rotate halfway through for even baking.

Mine took exactly 35 minutes, and at first glance I thought they had cooked too much and were slightly burned, but they actually tasted perfect and I now suspect that I have been taking my bread out a bit too soon. I will experiment with longer baking times.

Let the loaves cool 45 minutes before serving, and enjoy--I'm sure you will with this one!


Mixed ingredients sitting for 1 hr

Finished kneading 
After rising

Before rolling

Before baking

Out of the oven


Saturday, June 2, 2012

Kaiser Rolls

When I was a kid, kaiser rolls were the most tempting bread at the grocery store. The combination of their distinct aroma, fluffy texture, and seeded toppings made them irresistible. I am overjoyed to finally be making them at home, and I'm sure my younger self would be satisfied with the results.
(Another one from Peter Reinhart)

This takes 2 days to make.

Day 1: make the pre-ferment (pate fermentée)

Ingredients:
1 c unbleached all-purpose flour
1 c unbleached bread flour
1/2 t salt
1/4 t instant yeast
3/8 c + 1 T water, room temp

Sift together the dry ingredients into a large bowl. Add 3/8 c water, and stir until everything is combined into a workable dough. Add the remaining water if needed. (err on the wet side.)

Dump the dough onto a floured surface and knead 4-6 minutes until the dough is soft and tacky but not sticky. Oil and place in a bowl. Cover in plastic wrap and let sit at room temp ~1 hr, until 1.5 times original size.

Remove from the bowl and knead to degas. Replace in the bowl and refrigerate overnight.

Day 2: make the bread

Remove the pate fermentée from the fridge 1 hour before beginning. Cut it into 10 pieces, cover it with a towel or plastic wrap and let it sit.

Ingredients:
1 1/2 c pate fermentée (see above)
2 1/4 c bread flour
3/4 t + pinch of salt
1 t diastatic barley malt powder or 1 1/2 t barley malt syrup
1 t instant yeast
1 large egg, slightly beaten
1 1/2 T vegetable oil or shortening, melted
10 T to 3/4 c water, lukewarm
*optional: Poppy and sesame seed toppings
Semolina flour or cornmeal for dusting

After 2 hours rising
In a large bowl, combine the pate fermentée, egg, 10 T water, and oil/shortening. Sift in the dry ingredients, then mix everything together until it combines into a ball. If needed, add all of the water.

Transfer the dough to a floured counter and knead for 10 minutes until the dough is soft and tacky but not sticky. Place in an oiled bowl and let rise, covered with plastic wrap for 2 hrs.

Remove the dough from the bowl and divide it into 9 pieces for small rolls, 6 pieces for large rolls. Form each piece into a small roll, mist with oil, and let rest 10 minutes. While the dough is resting, line 2 baking sheets with parchment paper, mist with oil, and dust with semolina flour/cornmeal.

To shape the rolls, take each piece and roll it out to a strip 6''-8'' long. Tied the strand into a knot, keeping your finger in the middle of the knot. Take the ends and keep twisting around the strand, so one goes up through the center hole, and one goes down through the center hole. After trying a few, I figured out this works best when you pull on the dough to maintain surface tension while you are tying and twisting. (don't worry it won't break.)
Roll out each piece into a strand
Knot each strand into a roll
Ready to rise after shaping
Place the shaped pieces upside down on the parchment paper, and let rise 45 minutes. Flip over and let rise another 30-45 minutes more, until doubled in size.

While the rolls are on their second rise, preheat the oven to 450 F, with the oven rack in the middle. Have a misting spray bottle on hand. If you want to add seeds to the rolls, mist them and sprinkle with poppy or sesame before baking.

Place the pan in the oven, mist the walls, and bake for 10 minutes. Rotate the pan 180 degrees, and lower the oven to 400 F. Continue baking until the rolls are medium golden brown, approximately 15-30 minutes for large rolls, less for small. Transfer the rolls to a cooling rack and wait 30 minutes before serving.
 

Focaccia


Focaccia is one of those breads that brings back memories of Italy for me. Especially when it's made properly. Thick, fluffily, perfectly oily, perhaps a little crumbly too. Italian Focaccia. It's not the same here in the US.

As a result, I don't usually buy it at stores here--it's always a disappointment--and I was excited to see a recipe for it in Peter Reinhart's "Bread Baker's Apprentice". In the book he has 3 versions of focaccia--regular, made with poolish, and pizza-style. He also has a recipe for Herb Oil to top the dough. I decided to make poolish focaccia, since breads made with pre-ferments are more flavorful. This does require you to make the poolish a day ahead of time.

Day 1: make the poolish

Ingredients:
2 1/4 c bread flour
1 1/3 c water, room temp
1/4 t instant yeast

Combine all ingredients in a bowl until the flour is hydrated. It should be like thick pancake batter. Let sit at room temperature 3-4 hours, until it is bubbly. Refrigerate overnight.

Day 2: make the focaccia

Remove the poolish from the fridge 1 hr before making the dough

Ingredients:
3 c poolish (~the recipe above)
2 2/3 c unbleached bread flour
2 t salt
1 1/2 t instant yeast
6 T olive oil
3/4 c water, lukewarm
1/4 c-1/2 c herb oil (recipe below)

Sift the dry ingredients into a bowl. Add the poolish, olive oil, water, and mix until the ingredients form a sticky ball. If mixing by hand, mix for 3-5 minutes, dipping the spoon or your hand into cold water to work the ingredients into a smooth mass. If using a mixer, use a dough hook and mix 5-7 minutes until a smooth, sticky dough has formed. Add more flour if needed.

Transfer the dough to a floured work surface and pat it down into a 6'' rectangle. Let it relax for 5 minutes. Stretch the dough out to 3 times it's width and fold it over itself like try-folding a letter. Mist the dough with oil and cover with plastic wrap. Let rest for 30 minutes.

Stretch and fold the dough one more time, mist and cover, then let sit for 1 hour. It will swell but might not double in size.

While the dough is resting, make the herb oil.

Ingredients:
2 c olive oil--not extra virgin, anything will work
1 c chopped fresh herbs--basil, parsley, thyme, oregano, tarragon, rosemary, cilantro, savory, sage--or 1/3 c dried herbs.
1 T kosher salt
1 t coarse ground black pepper
1 T granulated garlic or 5-6 cloves fresh, chopped/pressed
*optional: 1 t ground cayenne pepper
*optional: 1 t paprika
*optional: 1 T fennel seeds
*optional: 1 t onion powder, or 1 T dried minced onions

Warm the olive oil to about 100 degrees F. (only warmed! do not heat!) Add there herbs and seasonings of your choice and let steep. When I made this I put in cayenne, paprika, and ground black pepper, and it was pretty spicy.

When the focaccia is almost done resting, line a 17'' x 12'' sheet pan with baking parchment and drizzle 1/4 c olive oil over the parchment, spreading the oil over the entire pan. Transfer the dough to the pan and spoon half the measured herb oil (~1/4 c) on top of the dough. Using your fingers, dimple the dough while spreading it out along the pan. Keep the thickness consistent and don't worry about filling the whole pan. Add more oil if needed, so the top stays coated. Cover with plastic wrap and proof ~2 hrs, until the dough fills the pan.

15 minutes before baking, drizzle on more herb oil, and dimple in the dough so the oil forms pools, and the dough spreads out to fill the entire pan (if it hasn't already). It should be about 1/2'' thick. Let it sit 15-30 minutes before baking, until it has risen to 1''.

Preheat the oven to 500 F, oven rack on the middle shelf. Place the focaccia in the oven, lower the temperature to 450 F, and bake for 15-20 minutes, rotating halfway through. The bread is done when the focaccia is golden brown. Immediately transfer the focaccia to a cooling rack after removing it from the oven. Let cool 20 minutes before serving.

Thursday, May 31, 2012

Cinnamon Buns & Sticky Buns (Teaser)


Because I can't share all of Peter Reinharts recipes (you'll have to go out and buy the book for them), here are photos of the cinnamon buns and sticky buns I made a few weeks ago. I will say, they were superb--some of the best I've had--and well worth the time it took to make them.

I couldn't decide between making sticky buns or cinnamon buns, so I ended up making both. This worked out perfectly because the process for sticky buns was a little more time-consuming and they baked for twice as long at a lower temperature. I put the cinnamon buns in the oven first while the sticky buns continued to rise and I prepped the pan. When the cinnamon buns were done baking, the sticky buns were done rising, so I lowered the oven and placed them in.

Both buns are made with the same dough and swirled roll. The differences come in the finishing touches. Cinnamon buns are glazed with a sweet white fondant, while sticky buns are baked upside down on top of a layer of raisins, nuts, and what will become the caramel glaze. I added orange extract to both glazes to complement the flavor of the buns.
Sticky buns, just out of the oven
Cinnamon buns, glazed and cooling

Thursday, May 10, 2012

Cinnamon Raisin Walnut Bread

As a cinnamon-lover I just had to include this recipe. Whenever I crave cinnamon, I usually make a nice orange-flavored cinnamon bread. This version, full of sweet raisins and crunchy nuts brought together with my favorite spice, proved to be tough competition for my standard go-to. Recipe from Peter Reinhart's "The Bread Baker's Apprentice".
The bread takes about 4 1/2 hours to make and yields 2 loaves.

Ingredients:
3 1/2 c bread flour
4 t sugar
1 1/4 t salt
2 t yeast
1 1/4 t cinnamon
1 egg, slightly beaten
2 T shortening, room temperature or melted
1/2 c buttermilk or whole milk, room temperature
3/4 c water, room temperature
1 1/2 c raisins, rinsed and dried
1 c coarsely chopped walnuts

Cinnamon sugar mix: 1/2 c sugar + 2 T cinnamon

In a large bowl, sift together the dry ingredients (flour, sugar, salt, yeast, cinnamon). In another bowl combine the egg, shortening, milk, and water. Add the second mixture to the dry ingredients and combine until a ball of tacky dough has formed. Add more flour or water if necessary to make the dough workable but not too sticky.

Dump the dough onto a floured work surface and knead for 8 minutes, adding flour as needed. Knead in the raisins and walnuts for an additional 2 minutes until they are evenly distributed throughout the dough. I like to do this in the original mixing bowl to avoid spilling ingredients everywhere when I'm trying to mix them in.

Oil the dough and let it rest in a bowl covered in plastic wrap ~2 hours, until doubled in size.

After the dough has doubled, divide it into 2 equal pieces and roll each one out so it is a rectangle approximately 5'' wide and 1/3'' thick. Sprinkle with cinnamon sugar mix and roll up, pinching closed at the end to make a nice firm loaf. Place in oiled loaf pans and cover loosely with plastic wrap. Let sit 60-90 minutes, until the loaves are just peaking above the tops of the pans.

When the loaves are done rising, bake at 350 F for 40-50 minutes, rotating halfway through to ensure an even bake. They are done when they are golden brown and hollow when tapped on the bottom.

Optional: When you remove them from the oven, immediately brush the tops with melted butter (or take solid butter and rub it on, it will melt from the hot bread). Have the cinnamon sugar mix sprinkled on your work surface. Flip the loaves into the cinnamon sugar and roll over to coat.

Cool the loaves minimum 1 hr, recommended 2 hrs, before serving.

Sunday, May 6, 2012

Ciabatta


Note: This takes 2 days to make.

Ciabatta is one bread I have wanted to make for a while now, but have always shied away because it requires baking in a steam-injecting oven to achieve it's characteristic crust and texture. Thanks to the direction provided by "The Bread Baker's Apprentice", I was able to replicate this result at home.

Day 1: Make the Poolish sponge

Ingredients:
2 1/2 c bread flour
1 1/2 c water, room temp
1/4 t yeast

Sift the yeast and flour together into a bowl. Add the water and mix until consistent. The dough will be soft and sticky. Cover the bowl with plastic wrap and let it sit out for 3-4 hours, until the dough forms bubbles. (It helps if you are using a glass bowl; you can see the bubbles through the sides of the bowl. Refrigerate overnight.

Day 2: Make the bread

Remove the poolish from the refrigerator 1 hr before you are ready to begin mixing.

Ingredients:
3 1/4 c poolish (~ the recipe above; measure to double check and adjust other ingredients if needed)
3 c bread flour
1 3/4 t salt
1 1/2 t yeast
6 T - 3/4 c water, lukewarm (can substitute olive oil or warm milk if you want a softer loaf)
Semolina flour or cornmeal for dusting

You can mix the dough by hand or with a mixer or food processor. I used a food processor so I will explain this method first. Sift the dry ingredients into the mixing bowl, then add the poolish. Measure 6 T water into the bowl and turn it on. Slowly add more water through the top until it gathers into a ball. The dough should be wet but not too sticky. Let it run for about a minute to knead itself. Turn it out onto a floured surface.
If working by hand, sift all dry ingredients into a bowl and add the poolish. Using your hand or a mixing spoon, repeatedly dip into the water and mix the dough around the bowl quickly until everything is evenly combined. Change direction occasionally. Continue for 5-7 minutes. When the dough is gathered into a ball, turn it out onto a floured surface.

Press the dough down into a rectangle and let it rest for 2 minutes. Stretch it out to twice it's width, then fold the long ends over each other (like tri-folding a paper into an envelope). It should be back to it's original shape. Spray the dough with oil, dust it with flour, and cover it with plastic wrap. Let it sit 30 minutes.

After a half an hour, repeat the directions in the previous paragraph. Let the dough rest 1 1/2-2 hours.

Next you will be setting the dough up in a couche. Essentially, a cloth you lay down and around the bread to support it while it rises. The book recommends using an old tablecloth; I used an old pillowcase. Make sure the cloth is covered with plenty of flour. Sprinkle the dough with flour. Divide it into 2 or 3 pieces. Roll each piece in the flour so it is coated evenly on every side. Lay each loaf on the cloth, and once more stretch out and fold so they are 6'' long. Make sure there is a wall of cloth between the pieces of dough. Spray the dough with oil, dust with flour, and cover with a towel. Proof 45-60 minutes, until swollen.

Preheat the oven to 500 F. If you have a baking stone, make sure it is in the oven on a mid-lower rack. Also place a cast iron pan or heavy-bottomed baking tray on the top rack. This will be your steam pan. Have a spray bottle of water on the mist setting ready as well. You will use this to mist the sides of the oven walls after the bread is in the oven.

Sprinkle the back of a baking sheet with semolina flour or cornmeal. Bring 1 c water to boil. When the oven is preheated and the loaves have risen, transfer the loaves to the sheet pan. Stretch them out to 9''-12'' long, pressing down the center with your fingertips if needed. Open the oven and slide the loaves onto the baking stone, or place the pan directly in the oven. Pour the 1 c of boiling water into the steam pan and close the door. 

After 30 seconds, open the door and mist the side walls of the oven and close the door.

Repeat the previous step 2 more times. After the final misting, lower the oven temperature to 450 F and set the timer for 10 minutes. Remove the steam pan from the oven. After 10 minutes if the loaves are not done, rotate 180 degrees (if needed) and bake 5-10 mins longer. Mine did not need to be rotated and only baked for a few minutes longer.

Transfer the bread to a cooling rack and cool 45 minutes before serving. The smell, taste, and texture were all spot-on!

Thursday, May 3, 2012

Brioche

I am now living with my brother's family in Seattle and they own several fantastic cook books, including "The Bread Baker's Apprentice"by Peter Reinhart. I picked the book up yesterday and could not put it down until I had finished the introduction and reached the first few recipes. I then made up my mind to start working through the recipes in alphabetical order, skipping those I have already made, and going back to the ones I did not have ingredients for.

Brioche is the 4th recipe in this book, and there are 3 versions of it. Rich man's brioche, middle man's brioche, and poor man's brioche. Rich man's brioche contains the greatest proportion of butter to flour (88%), middle man's has less (50%), and poor man's has the least (20-25%). Brioche is traditionally a rich dough, but I didn't want to kill my family by making it so incredibly rich, so I decided to make middle man's brioche.

Note: This recipe took me 2 days to make; it requires 30-45 min fermentation period, 4 hours (min) refrigeration of the dough, ~2 hr rise, and 15-45 mins baking. If you want to complete it in a day, start in the morning.

Ingredients for the sponge:
1/2 c unbleached bread flour
2 t instant yeast
1/2 c whole milk, lukewarm (90-100 degrees F)

Ingredients for the dough:
5 large eggs, slightly beaten
3 cups unbleached bread flour
2 T sugar
1 1/4 t salt
1 c unsalted butter, at room temp

1 egg, whisked until frothy, for egg wash

In a large mixing bowl stir together the ingredients for the sponge until everything is hydrated. Cover with plastic wrap and let sit 30-45 mins, until it is airy and well risen. I forgot to let the butter sit at room temperature, so my sponge sat for 2 hours and it was fine.

While you are waiting for the sponge, prepare the other ingredients. Whisk the eggs together in a bowl. In another bowl, sift together the flour, salt, and sugar. When the sponge is ready, using either an electric mixer or by hand, mix the eggs into the sponge. Add the dry ingredients to the mix, incorporating them slowly until everything is evenly mixed and a sticky dough has formed. Let this sit 5 minutes for the gluten to develop.

Next, begin incorporating the butter, 1/4 at a time. Make sure the butter is mixed in well before adding more. After everything is combined (this will take a while if you are doing it by hand), transfer the dough to a sheet pan lined with parchment paper. Make sure you spray the parchment paper with oil before you place the dough down. I forgot to do this and it stuck to the paper. Press the dough into a rectangle about 6'' x 8''. Spray the top of the dough with oil and cover it in plastic wrap. Refrigerate 4 hours minimum, or overnight.

When you are ready to shape the dough, first decide what shape you are going to make. You can make petites brioches à tête (pictured below), larger versions if you have the correct molds, or loaves. The petite version can be made in a specific mold or just a regular muffin tin, which I used.

This recipe makes 12-16 petites brioches à tête, 2-4 larger brioches à tête, or 2 1 lb loaves. I made 9 petites brioches à tête and 1 loaf.

Spray the pans with oil and remove the dough from the fridge to immediately divide up the dough to begin shaping. If the dough warms up at all place it back in the fridge and wait for it to cool down again. To make the brioche à tête, dust your hands and work surface with flour. There are two methods to shape them. I recommend you try both (as I did) and decide which you like best. 
Method 1: Take the dough and roll it into a strand that tapers at one end. Poke a hole in the thick end and loop the smaller end through. Round the small end off so it looks like a ball.
Method 2: Roll the dough into a ball and press down with you hand while rolling so a small portion breaks off. Roll this into a small ball. Place the large ball into the pan, indent the top, and place the smaller ball on top.

For the loaf lay your dough down on a floured surface and press it into a rectangle, about 7 inches long. Beginning with one of the larger sides, pull the dough over to create suface tension. Do the same with the other edge and tuck the edges together so they stay. Flip the dough over and you will have an even loaf. Place it in the greased pan. Spray with oil and cover with plastic wrap. 

Let the petites brioches à tête rise 1.5-2 hours, until they nearly fill the pans. The loaves and larger brioches à tête will take longer.

After rising, brush with egg and let the dough sit another 15-30 minutes. Preheat the oven during this time. 400 F for the petites brioches à tête and 350 F for the larger brioches à tête and loaves.

Timing actually works out perfectly for making both loaves and petites brioches à tête. The petites brioches à tête were ready first, so I baked them while the loaf was still rising. Then I lowered the oven temperature and baked the loaf.

Bake the petites brioches à tête 25-20 minutes, until they are golden brown. Bake the loaves and larger brioches à tête 35-50 minutes. (my loaf took about 45 minutes) Remember the oven temperature is 50 degrees lover for the larger ones.

Immediately remove from the pan when they come out of the oven and let them cool 20 minutes (small) or 1 hr (loaf/large) before serving. Enjoy with jam or your choice of topping. Definitely worth the work and/or wait!


Petites brioches à tête out of the oven. The loaf is still baking.


Monday, November 7, 2011

Birthday Dinner Surprise!


Yesterday was my birthday & I was out of town for the weekend. I came home in the evening and my mom surprised me with a wonderful meal including some of my favorite foods. I'm making an exception & sharing the recipes on here even though I didn't make them myself because they were just too good!

First, we had a butternut squash bisque with salad. The recipe was originally introduced to me by my roommate Carolyn & we made it a few times together in college. My family grows butternut squash in our garden & we save seeds each year for next year's crop.

The second course consisted of rice cakes with asparagus. Rice cakes are something my nonna used to make & they are deceptively delicious for how simple they are to make! I cannot express how much I love rice cakes, and this was the most perfect birthday surprise.

The best food, of course, was dessert. I smelled it as soon as I came in through the door & was immediately overjoyed by the tower of cinnamon buns before me. Another guilty pleasure--one I don't often indulge in.

The recipe for butternut squash bisque is linked above, and I follow it almost exactly as it's listed. I only make 2 changes to the recipe: I omit the cream (it's very tasty without it) and I roast the squash first. To do this, preheat the oven to 375 F and cut the squash in half lengthwise. Scoop out the seeds & place each half in a glass baking dish cut side down. Fill with 1-2 inches of water (enough so it won't evaporate while it's baking) and roast in the oven for 30-40 minutes.  It's done when the squash is soft, usually when the skin is browning.

Follow the rest of the directions for making the soup, & puree in a blender. Season with nutmeg, salt, & pepper while you are blending, & sprinkle more spices on when you serve.
Butternut Squash Bisque

A quick video I made while eating the soup

To make rice cakes you simply cook some risotto, add cheese, egg, nutmeg, cover in breadcrumbs, & bake until browned.

Ingredients:
1 c arborio rice (or similar)
vegetable/chicken stock, warmed (about 2 c) plus more boiled water if you need it
1/2 c shredded mozzarella cheese, plus more cut into chunks
nutmeg
1 egg
salt & pepper, to taste
1 T olive oil
1/2 c breadcrumbs

Preheat olive oil in a pan, add rice & some stock. Add more as the rice absorbs it. Cook about 20 mins, until done but still has a bite (al dente). Add shredded mozzarella cheese to the pot & stir. Let cool.

Preheat oven to 350 F. 

When the rice is cooled, add the egg & sprinkle nutmeg (about 1 pinch). Pour breadcrumbs in a wide, shallow bowl & gather 1/2 handful of rice in one hand. Flatten the rice, place 1 chunk of cheese in the middle, cover with more rice, form a ball, & roll in the breadcrumbs until covered. Place on a baking dish. Repeat until all of the rice is used up. Bake 30 minutes, until browned.

Rice Cakes

Finally the recipe for cinnamon buns is one we have never made before. This is a healthy version of cinnamon buns, as my mom omitted the icing drizzle off the top, but I'll include the recipe here so you can make it if you choose. This recipe comes from The Fannie Farmer Cookbook.

Ingredients:
1 T yeast
4 1/2 c flour (my mom used whole wheat pastry flour)
1 c lukewarm milk
3/4 c sugar
1 t salt
1 T cinnamon
2 eggs
2 T butter
milk, to brush
*optional 1/2 c raisins
*optional cinnamon sugar mix--use if not making the icing

Ingredients for the icing:
3/4 c confectioners sugar
4 t warm water
1 t vanilla

First, start the yeast in 1/4 c warm water & let stand 5 minutes, until bubbling. Add milk & 3 c flour & mix. Let rise until light.

Add sugar, salt, cinnamon, eggs, butter, & 3/4 c flour & blend. Turn out onto a floured board & knead in the remaining 3/4 c flour until the dough can be easily handled. Knead in the raisins. Here, my mom let the dough rise again before shaping, though the recipe says to continue on & shape them.

Pull off pieces of the dough (about the size of M lemons), and roll until they're ~ 8'' long. Wind each one into a coil & arrange on a buttered 9'' cake pan. Cover & let rise until doubled. Brush tops with milk & sprinkle with cinnamon sugar if not making icing.

Preheat the oven to 375 F & bake 25 minutes, until browned. While the rolls are baking, whisk together the icing ingredients in a small bowl. Spread a thin layer over the buns as soon as they come out of the oven.

Cinnamon Rolls

Monday, October 31, 2011

Stromboli


This is another recipe my mother has been making for years. For the longest time, it was the only way I ate spinach, & the only stromboli I had ever tasted. Now when I try stromboli at a restaurant or Italian deli, it just doesn't compare. The bread is quick to make and full of veggies with the perfect balance of cheese & meat.

First, make the dough.

Ingredients:
2 T yeast
1 T sugar/honey
1 3/4 c warm water
2 t salt
1 T oil
5 c flour (1/2 white, 1/2 whole wheat)
*optional 2 T flax

In a large bowl, combine 1 c water with honey & add yeast. Let sit 5-10 mins until the mixture is frothing.  Add oil & sift in dry ingredients, adding one cup of flour at a time. Stir until the dough cannot be mixed anymore & pour onto a floured surface. Knead ~10 mins, until the dough is springy. Coat in oil, place back in the bowl, & cover with a towel.

Let rise ~1 hr, punching down intermittently.

While the dough is rising make the filling.

Ingredients:
1 stalk celery
1/2 red pepper
8 oz frozen spinach (or fresh)
1 medium onion
1 carrot
2 cloves garlic
8-10 slices provolone cheese
*optional prosciutto

Finely chop all of the vegetables & mince the garlic. Heat a large saucepan on M & add a few T of oil. When the oil is hot, add one at-a-time carrots, onion, garlic, celery, pepper & saute until soft and the onions are translucent. Add the spinach. If using frozen spinach, cook until it's warmed up; if using fresh, cook until the leaves are dark green and soft. Remove from heat, cover & wait for the bread to finish rising.

When the dough is ready, preheat the oven to 425 F. Grease & sprinkle with cornmeal 1 baking sheet.

Separate the dough into two halves and roll the first half out on a floured surface until it is 1/4" thick. Try to keep it an even circle/oval shape. Spread the dough with half of the filling & place a few slices of cheese & prosciutto on top. Roll up & carefully place on prepared baking sheet. Repeat with the other half of the dough & filling. Cut 5-6 slits along the top of the bread & bake 20-25 minutes until golden brown.

This time making it, I couldn't remember how much spinach to use & ended up using a whole pound! As a result, the stromboli were overflowing and very delicate. My rolls were also too long for the tray, so I tucked the ends under. The cheese dripped out a little into the oven, but the result was just as good as I remembered. I couldn't resist eating 3 slices immediately when it came out of the oven, and 2 later. Dinner tonight ended up being stromboli & salad :)

Tuesday, October 25, 2011

Sesame Semolina


Sesame semolina was one of my favorite breads to buy in the store. The combination of seeds & crunchy crust always kept me coming back for another slice. I decided to try making it at home a few years ago and now no store-bought bread can compare.

Ingredients:
2 c warm water
1 T yeast
1 T sugar
1/2 c semolina flour
2 c whole wheat flour + white flour (~3 c)
1 t salt
1/4 c sesame seeds
1 egg

First, start the yeast in 1/2 c water and sugar. When the yeast is foamy, add the rest of the water. Sift the semolina flour, salt, & 1 cup whole wheat flour into the bowl & mix until well-combined. Sift the rest of the flour in, 1 cup at a time, and stir after each addition. When the dough has gathered into a ball and it is difficult to mix more flour in, dump it out onto a floured board.

Knead for 8-10 minutes, until the dough stops taking up more flour, and it has a springy texture. Place back in your  mixing bowl, coat in oil, and cover with a towel. Let rise for 1 hr, until doubled. Punch down the dough a few times while it's rising.

After the first rise pour all but a few tablespoons of the sesame seeds into the bowl, and knead them in.
Dump the dough out & shape into a loaf. I like to make a nice braided loaf. Simply cut the dough into approximately 3 equal pieces, roll each into the same length strip, then braid. Make sure the ends are tucked under.

Preheat the oven to 350 F.

2nd rise; before going in the oven.
Place the shaped dough onto a greased & floured baking sheet & let rise 20-40 minutes, until doubled. You can test when it's done by poking it slightly. If the dough holds the indent, then it's done rising. Be careful about over letting the dough rise too much as it will collapse when you brush with egg.

Finally, brush the dough with egg, sprinkle with the remaining sesame seeds, & bake for 40-45 minutes until golden brown and hollow when tapped on the bottom.

Today I made one very long braided loaf, though I usually make two smaller loaves.

Sunday, October 9, 2011

Pizza

Another family tradition, not only do we make classic Italian thin pizza, but we also cook it on the grill. It bakes fast, and the textures and flavors are unmatched by any oven baking.

This measurements for this recipe are roughly based on how many pizzas you want to make (1 pizza feeds about 1 person). Usually we make more so there are leftovers the next day. It reheats nicely in the toaster oven.

Ingredients:
~1/2 c water per pizza (though 1 1/2 c water is good for 4 pizzas)
1 T yeast for 1 1/2 c water
1-2 T olive oil
1/2 t salt per pizza
whole wheat & white flour

Measure the water, making sure it is warm to the touch & start the yeast in the water. Sometimes, if the yeast is difficult to start, it is best to measure out only 1/2 c warm water first with a sprinkle of sugar & start the yeast, then add the rest of the water later. Whatever you do, make sure the yeast is nice & foamy (5-10 mins waiting) before you being working.

Add the salt & olive oil to the bowl of yeast. Take a good wooden spoon, preferably slotted, and while stirring with your right hand, pour whole wheat flour into the bowl, one scoop at a time. Once the dough has started to combine, begin adding white flour while mixing. (You can mix the proportions of white/wheat if you want, but I've found a nice half/half mix is very good.) Dump the dough onto a floured surface and knead for about 8 minutes, until a springy texture is reached and the dough stops picking up too much flour. Replace back into the bowl and coat in vegetable oil.
Cover with a towel and let sit for min 1 hr to rise. Punch down every 15-30 mins to help the rising process.

When you are ready to make the pizza, prepare your ingredients. Usually I'll make a focaccia (olive oil, salt, & oregano), margherita (cheese, tomato sauce, oregano, fresh basil), peppers, onions, mushrooms, pesto, fresh tomatoes, think of other delicious combinations!

Preheat the grill (see below). Grab a handful of dough and place it on a floured surface. Roll it out with a rolling pin until its very thin. As thin as a couple pieces of paper. If the dough is elastic and keeps pulling in, keep working at it.

Heat the grill so that one side is L & the other side is H. You might have to play around with this depending on your grill, but the aim is to create an oven-effect: Place the pizza on the low side to cook the bottom and the heat from the high side will cook the top. Friends are always skeptical at first, but yes, just place the dough directly on the grill. I usually do a strategic drop, to get it to stay flat while not burning my fingers--it does take some practice so don't get frustrated if it's not perfect your first try. After the dough is on the grill, add the toppings, sauce first, then cheese & others. Err on the side of adding too little toppings rather than loading up the pizza. Everyone I know who tries grill pizza for the first time makes this mistake, and unfortunately if there are too many toppings, the top never cooks through while the bottom might burn. No good. I promise, with thin-crust pizza, less is better :)

After about 2-3 minutes, check the pizza and give it 180 degree turn. I use a pizza paddle, but this can easily be done with tongs or a grill spatula. After 2 minutes more the pizza should be done, when the cheese is bubbling and toasting & the crust is browned. Remove by sliding off using either tongs or a spatula, directly onto a cutting board. Cut & serve.

I try to roll out the next pizza right before I remove the cooking pizza from the grill, that way I can take one off and put the next one on the grill right away.

Monday, September 26, 2011

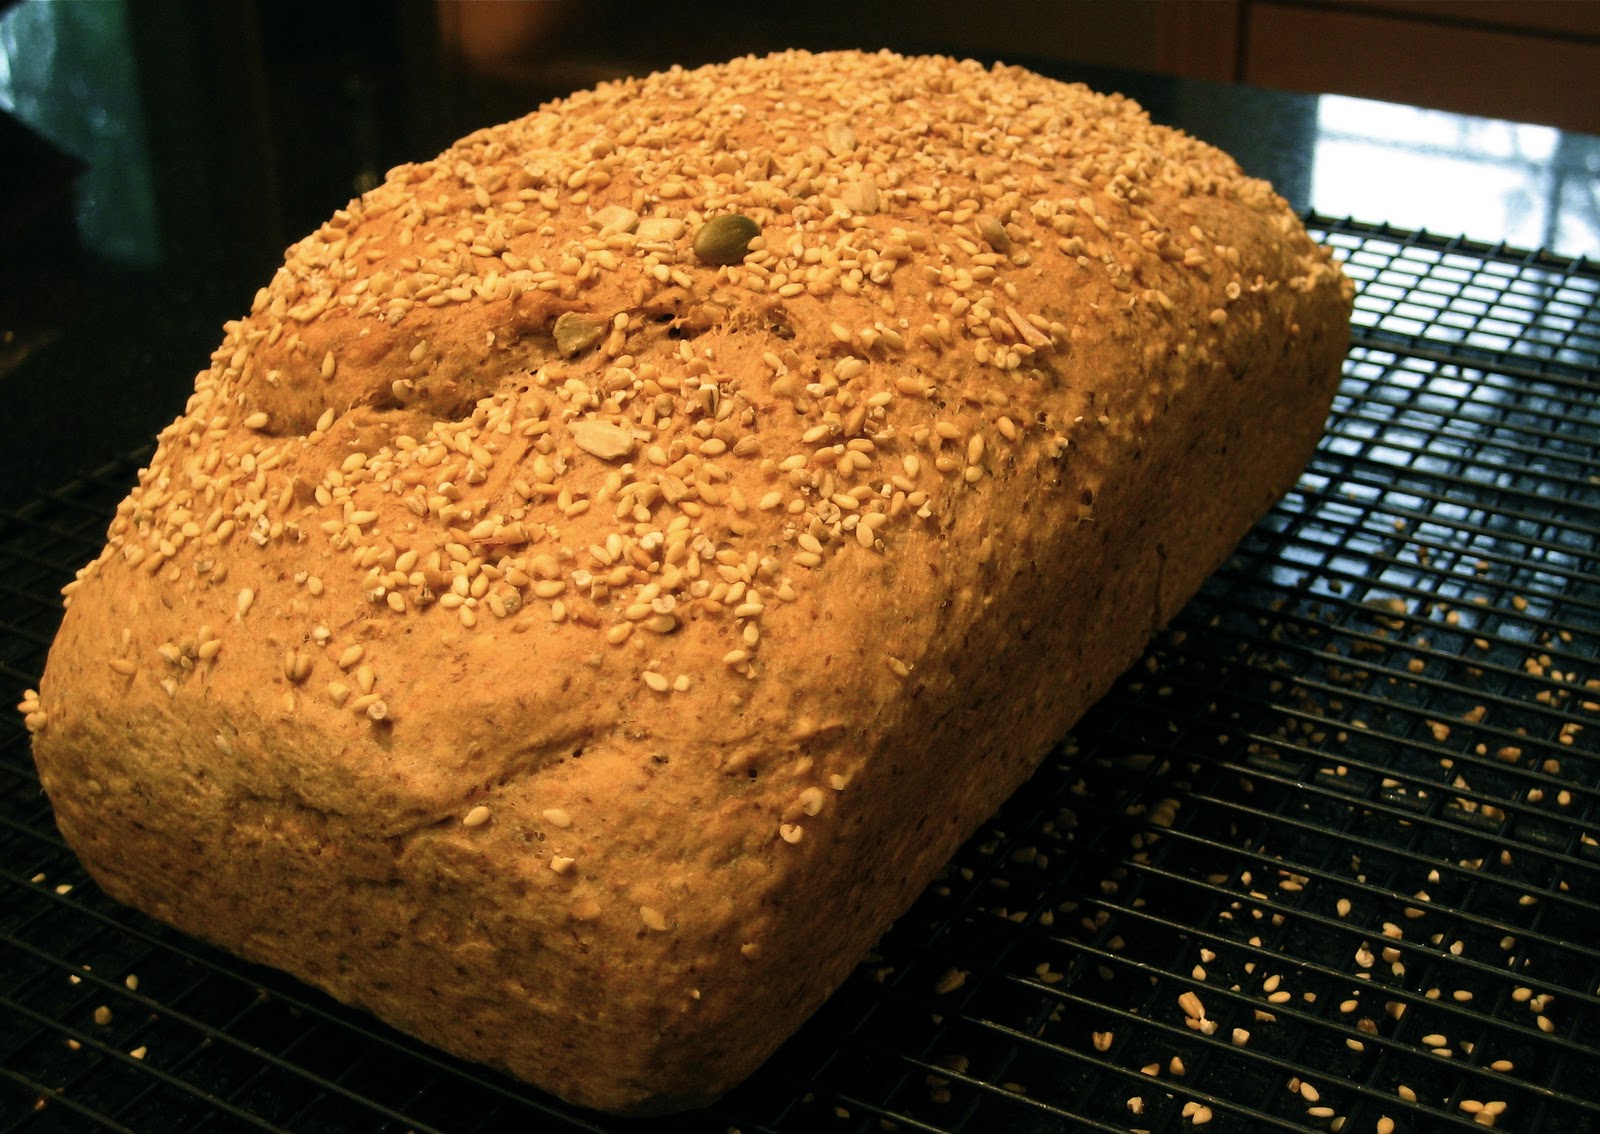
Multigrain Seeded Bread (German Brown Bread)

I found this recipe online one day when I was craving a hearty multigrain/whole wheat bread. Something tasty and full of flavor but not so dense that every bite weighs you down. In the reviews, someone said it tasted like authentic German seeded bread. After making it once & having been to Germany and eaten their delicious dark bread, I agree. Thus, my name for this bread is: German Brown Bread.

Here is the original recipe, from allrecipes.com

The great thing about this recipe is there is a lot of room for improvisation. Not only with the ingredients, but also in the method. I like making bread by hand because it's fun, but this can easily be made in a bread machine. Also, I made some changes to the method listed in the recipe (mostly because it didn't make too much sense). I'm going to tell you how I did it here, to see the original, just click the link above.

Ingredients:
1 package yeast
1 1/2 c whole wheat flour
3/4 c white flour
1/2 t salt
2 T molasses
1 c water
1 egg white
3 T sunflower seeds
3 T pumpkin seeds
3 T sesame seeds
1/3 c rolled oats (steel cut oats also work)
1 T milk

In a small pan, mix together the water and molasses and heat until the water starts to steam. I usually stick my finger in to test the warmth, or you can use a thermometer--about 120 F. If it is too hot to hold your finger in for a few seconds, then it is too hot to start the yeast. If the water is the right temperature, pour into a large bowl and add the yeast & salt. Set aside until it's foamy, about 5-10 mins.

Meanwhile, sift your flours into a bowl & separate your egg white. You can substitute anything you like for flour here. Usually I'll put in oat flour for some of the white flour, and bran & flax for some of the wheat. When the yeast is ready, pour some of the flour into the bowl and mix. Then add the egg, then the rest of the flour. If the dough is too dry to mix with a spoon, pour out onto a floured surface and start kneading. If you need to add more flour, do that and then begin kneading.

Knead the dough for 10 minutes. Place back into the bowl, coat with vegetable oil, and cover with a towel.

Let rise 2 hours. While rising, punch down every 15-30 mins. The more you punch it down the more the dough rises.

Now is the fun part! Uncover the bread and bring it back to your workspace. Mix together the seeds & oats & sprinkle all except 2 T into the bread bowl. (The 2 T will be for sprinkling on top later). Knead the seeds into the dough until combined. Empty onto a floured surface and shape into a loaf. Place into a greased loaf pan, cover, and let rise 1 hr.

Preheat oven to 350 F. Brush with milk and sprinkle with remaining seeds. Bake 30 minutes. Test to see if the bread is done by turning it out of the pan and tapping on the bottom. If it sounds hollow it's done. Let cool before serving.

The tanginess from the molasses & crunch of the seeds result in a very satisfying flavor & texture combination. Mmm, great with dinner and it will be even better for breakfast tomorrow morning.