Friday, November 25, 2011

Pasta with Salmon


I made this for lunch with leftover salmon from the night before, though it can easily be made with fresh salmon or tuna, or as a quick meal with canned tuna. It is easy to make, tasty, and quite filling. Also I think it'd be good with fresh veggies like tomatoes or chives.

This made 3 large lunch servings.

Ingredients:
Fish: leftover/fresh salmon or tuna, about 1-2 servings
almost a full pound box of cappellini
1 T salt
1 T butter
3 T olive oil
*salt, pepper, & parsley to taste

If you are using fresh fish: cook the fish however you like. I baked the salmon in the oven with olive oil, thyme, rosemary, pepper, then seasoned with a little salt and lemon after.

If you are using leftover fish, preheat a skillet--preferably cast iron--and melt the butter on M heat. While this is heating boil a large pot of water for the pasta. When the pan is ready, add the fish and heat it quickly, chopping it up with a spatula as you go. Flip it over a few times and it'll be done. Add more seasonings if you like, but if the fish tasted good the the day before it'll still taste good today.

Add salt to the water and boil the pasta (cappellini only takes 1-2 mins). Strain, saving a few T of water. Combine pasta, fish, and reserved water in a bowl with the 3 T of olive oil and toss together. Serve immediately and sprinkle with salt, pepper, and fresh parsley if desired.


Wednesday, November 23, 2011

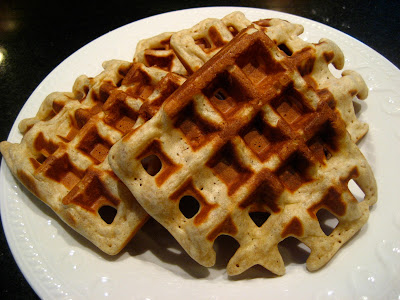
Waffles

Sometimes waffles don't look perfect...

Nothing says "breakfast" like fluffy waffles, drizzled in maple syrup and fresh butter, and served with sweet and savory toppings like yogurt, fresh fruit, and chocolate chips.

Since everyone in my family is home for Thanksgiving, this is also a great choice for feeding lots of people. Our waffle iron makes 4 squares at a time, and the recipe makes about 4 servings, which can be easily doubled.

**This recipe can also be used to make pancakes**

Ingredients:
1 1/2 c flour (1 c regular, 1/2 c whole wheat)
1 t salt
1 3/4 t baking powder
3 T sugar
3 T oil
1-2 eggs (more eggs=fluffier, less=crisper)
1- 1 1/4 c milk

Preheat waffle iron and spray with nonstick cooking spray if needed. In a medium bowl, sift together the flour, salt, baking powder and make a well. In the center of the well add the rest of the ingredients. Using a whisk, first combine the ingredients in the center of the bowl, then quickly mix them into the dry ingredients until they form a thick batter. Usually if I'm only using 1 egg then I'll add the full 1 1/4 c milk.

Once the waffle iron is preheated spoon enough batter into each section and cook until golden brown. Ours takes about 3-4 minutes. If you like, you can add blueberries, sliced banana, cinnamon, or chocolate chips to the batter when it is cooking.

Remove from the waffle iron and serve immediately with toppings of your choice.

...sometimes they do.

Wednesday, November 16, 2011

Penne all'Arrabbiata


This translates to "Angry Pasta" and is a fitting title since penne all'arrabbiata is a spicy dish. It uses small dried Italian peperoncini peppers which can be purchased at an Italian market. Other hot peppers can be substituted if you can't find these.

Ingredients:
4 T olive oil
peperoncini peppers (amount depends on desired hotness. 1=mild, 2=medium, 3 or more=hot)
1 clove garlic
tomato sauce--I will post my homemade recipe soon!

Garlic and hot peppers cooking in olive oil
First, bring a pot of water to boil, toss in some salt, and begin cooking 1 lb of penne. While this is going, peel & finely chop the garlic. Take the peperoncini peppers and chop them up into small pieces, making sure to chop up the seeds also--this releases the heat and makes the dish nice and spicy! If you don't like spicy food, leave the peppers whole.

Toss everything into a small pot with the olive oil and heat on M/L just until the olive oil begins to sizzle and the garlic is browning. Turn it off and remove from heat.

When the pasta is boiled, strain it and add tomato sauce to the pot with hot peppers. Mix this around, then add the pasta and stir until evenly coated over the hot burner.

Serve with plenty of parmesan, Mmm!


Thursday, November 10, 2011

Green Risotto


My mom tasted this dish before I did, and her immediate response was: "This tastes like it's from a restaurant!" After my first bite I agreed. The rice was creamy and flavorful; even I couldn't believe there was no chicken stock in it (and I was the one who made it!)

The recipe comes from a comprehensive Italian cookbook called The Silver Spoon. I haven't explored too many recipes in this book, but the few I've tried have always been winners. I felt like making something new for dinner, and took a quick look through the vegetable bin in our fridge. I pulled out red bell peppers, mushrooms, leeks, spinach, zucchini, carrots, & celery with plans for making a risotto primavera. After a quick look through the Silver Spoon, and it's dozens of risotto options, I settled on this recipe for green risotto. It used a handful of the vegetables I had selected, and allowed for a few easy substitutions with other ingredients.

This recipe serves 4 (large servings, in my opinion).

Ingredients:
3 T butter
3 T olive oil
2 c arborio (or other risotto) rice
~4 c vegetable stock (or chicken stock)
boiled water
1 2/3 c fresh spinach, chopped
1 carrot, chopped
1 stalk celery with leaves, chopped
1 small leek, thinly sliced (only the white part) OR 1 small onion, chopped
*1 clove garlic, minced
salt, to taste
grated parmesan cheese
**optional: parmesan rind, for flavor

*looking back at the recipe, I realize I forgot to add this. It was fine without garlic, and I probably won't add it next time.

About halfway done cooking
First in a medium pot, heat 2 T butter & the olive oil on M heat. Add the spinach, carrot, celery, leek/onion and cook 5 mins, stirring when necessary.

Reduce heat to L, season with salt, and cover for an additional 10 mins. While this is cooking, bring the stock to a boil in a small pot. Boil extra water on the side.

Throw the rice in & a few cups of the heated stock. Add the parmesan rind, stir, and simmer 18-20 minutes until the rice is done. Keep adding stock & stirring so the rice does not stick & it thickens as it cooks.

When the rice is done, take out the parmesan rind, add in the last 1 T of butter, and grate about 1/3 c fresh parmesan cheese into the pot. Stir until everything is mixed together. Sprinkle with parmesan cheese when you serve & enjoy!

Monday, November 7, 2011

Birthday Dinner Surprise!


Yesterday was my birthday & I was out of town for the weekend. I came home in the evening and my mom surprised me with a wonderful meal including some of my favorite foods. I'm making an exception & sharing the recipes on here even though I didn't make them myself because they were just too good!

First, we had a butternut squash bisque with salad. The recipe was originally introduced to me by my roommate Carolyn & we made it a few times together in college. My family grows butternut squash in our garden & we save seeds each year for next year's crop.

The second course consisted of rice cakes with asparagus. Rice cakes are something my nonna used to make & they are deceptively delicious for how simple they are to make! I cannot express how much I love rice cakes, and this was the most perfect birthday surprise.

The best food, of course, was dessert. I smelled it as soon as I came in through the door & was immediately overjoyed by the tower of cinnamon buns before me. Another guilty pleasure--one I don't often indulge in.

The recipe for butternut squash bisque is linked above, and I follow it almost exactly as it's listed. I only make 2 changes to the recipe: I omit the cream (it's very tasty without it) and I roast the squash first. To do this, preheat the oven to 375 F and cut the squash in half lengthwise. Scoop out the seeds & place each half in a glass baking dish cut side down. Fill with 1-2 inches of water (enough so it won't evaporate while it's baking) and roast in the oven for 30-40 minutes.  It's done when the squash is soft, usually when the skin is browning.

Follow the rest of the directions for making the soup, & puree in a blender. Season with nutmeg, salt, & pepper while you are blending, & sprinkle more spices on when you serve.
Butternut Squash Bisque

A quick video I made while eating the soup

To make rice cakes you simply cook some risotto, add cheese, egg, nutmeg, cover in breadcrumbs, & bake until browned.

Ingredients:
1 c arborio rice (or similar)
vegetable/chicken stock, warmed (about 2 c) plus more boiled water if you need it
1/2 c shredded mozzarella cheese, plus more cut into chunks
nutmeg
1 egg
salt & pepper, to taste
1 T olive oil
1/2 c breadcrumbs

Preheat olive oil in a pan, add rice & some stock. Add more as the rice absorbs it. Cook about 20 mins, until done but still has a bite (al dente). Add shredded mozzarella cheese to the pot & stir. Let cool.

Preheat oven to 350 F. 

When the rice is cooled, add the egg & sprinkle nutmeg (about 1 pinch). Pour breadcrumbs in a wide, shallow bowl & gather 1/2 handful of rice in one hand. Flatten the rice, place 1 chunk of cheese in the middle, cover with more rice, form a ball, & roll in the breadcrumbs until covered. Place on a baking dish. Repeat until all of the rice is used up. Bake 30 minutes, until browned.

Rice Cakes

Finally the recipe for cinnamon buns is one we have never made before. This is a healthy version of cinnamon buns, as my mom omitted the icing drizzle off the top, but I'll include the recipe here so you can make it if you choose. This recipe comes from The Fannie Farmer Cookbook.

Ingredients:
1 T yeast
4 1/2 c flour (my mom used whole wheat pastry flour)
1 c lukewarm milk
3/4 c sugar
1 t salt
1 T cinnamon
2 eggs
2 T butter
milk, to brush
*optional 1/2 c raisins
*optional cinnamon sugar mix--use if not making the icing

Ingredients for the icing:
3/4 c confectioners sugar
4 t warm water
1 t vanilla

First, start the yeast in 1/4 c warm water & let stand 5 minutes, until bubbling. Add milk & 3 c flour & mix. Let rise until light.

Add sugar, salt, cinnamon, eggs, butter, & 3/4 c flour & blend. Turn out onto a floured board & knead in the remaining 3/4 c flour until the dough can be easily handled. Knead in the raisins. Here, my mom let the dough rise again before shaping, though the recipe says to continue on & shape them.

Pull off pieces of the dough (about the size of M lemons), and roll until they're ~ 8'' long. Wind each one into a coil & arrange on a buttered 9'' cake pan. Cover & let rise until doubled. Brush tops with milk & sprinkle with cinnamon sugar if not making icing.

Preheat the oven to 375 F & bake 25 minutes, until browned. While the rolls are baking, whisk together the icing ingredients in a small bowl. Spread a thin layer over the buns as soon as they come out of the oven.

Cinnamon Rolls

Thursday, November 3, 2011

Banana Honey Tea Loaf


This variation of banana bread is much denser & offers a new array of flavors. I noticed the taste of the walnuts & cinnamon more than the banana. I think a nice addition to this recipe would be 1 chopped apple to complement the nuts & spice.

I found this in Bread Winner's by Mel London & it makes 1 large loaf.

Ingredients:
1/3 c mild-flavored honey
1/2 c light oil
3 medium ripe bananas, mashed
1 t vanilla
2 eggs, beaten (at room temperature)
1/2 c wheat germ (I substituted 2 T flax for this)
2 t baking powder
1/2 t salt
1/2 t cinnamon
1/2 c chopped walnuts
1 1/2 c flour (1/2 whole wheat, 1/2 regular)

Preheat oven to 325 F & grease loaf pan.

In a large bowl mix together the honey & oil. Then stir in the bananas, vanilla, & eggs. Sift the dry ingredients into another bowl, then add to the first mixture & stir until just combined. Add the walnuts & gently stir.

Pour the batter into the prepared pan & bake 1 hr, until a toothpick comes out clean. Let sit 5 mins in pan, then flip onto a wire rack until completely cool.

The recipe says to wrap snugly & refrigerate overnight before slicing but I couldn't resist trying a piece. I had some while it was still cooling and it was very good. Definitely something I will make again!

Monday, October 31, 2011

Stromboli


This is another recipe my mother has been making for years. For the longest time, it was the only way I ate spinach, & the only stromboli I had ever tasted. Now when I try stromboli at a restaurant or Italian deli, it just doesn't compare. The bread is quick to make and full of veggies with the perfect balance of cheese & meat.

First, make the dough.

Ingredients:
2 T yeast
1 T sugar/honey
1 3/4 c warm water
2 t salt
1 T oil
5 c flour (1/2 white, 1/2 whole wheat)
*optional 2 T flax

In a large bowl, combine 1 c water with honey & add yeast. Let sit 5-10 mins until the mixture is frothing.  Add oil & sift in dry ingredients, adding one cup of flour at a time. Stir until the dough cannot be mixed anymore & pour onto a floured surface. Knead ~10 mins, until the dough is springy. Coat in oil, place back in the bowl, & cover with a towel.

Let rise ~1 hr, punching down intermittently.

While the dough is rising make the filling.

Ingredients:
1 stalk celery
1/2 red pepper
8 oz frozen spinach (or fresh)
1 medium onion
1 carrot
2 cloves garlic
8-10 slices provolone cheese
*optional prosciutto

Finely chop all of the vegetables & mince the garlic. Heat a large saucepan on M & add a few T of oil. When the oil is hot, add one at-a-time carrots, onion, garlic, celery, pepper & saute until soft and the onions are translucent. Add the spinach. If using frozen spinach, cook until it's warmed up; if using fresh, cook until the leaves are dark green and soft. Remove from heat, cover & wait for the bread to finish rising.

When the dough is ready, preheat the oven to 425 F. Grease & sprinkle with cornmeal 1 baking sheet.

Separate the dough into two halves and roll the first half out on a floured surface until it is 1/4" thick. Try to keep it an even circle/oval shape. Spread the dough with half of the filling & place a few slices of cheese & prosciutto on top. Roll up & carefully place on prepared baking sheet. Repeat with the other half of the dough & filling. Cut 5-6 slits along the top of the bread & bake 20-25 minutes until golden brown.

This time making it, I couldn't remember how much spinach to use & ended up using a whole pound! As a result, the stromboli were overflowing and very delicate. My rolls were also too long for the tray, so I tucked the ends under. The cheese dripped out a little into the oven, but the result was just as good as I remembered. I couldn't resist eating 3 slices immediately when it came out of the oven, and 2 later. Dinner tonight ended up being stromboli & salad :)

Saturday, October 29, 2011

Mom's Chicken Soup & Crispelle

The other day while browsing the farmer's market, my mom and I decided to buy a chicken roaster. We roasted it in the oven and saved the carcass & scraps for chicken soup.

Usually chicken soup is made with raw chicken & it takes at least 3 hours to cook. Because we used cooked chicken, it only took 1 hr, and tasted just as good.

Ingredients for the soup:
cooked chicken scraps (seasoned how you like. we used rosemary, garlic, pepper, lemon)
1 onion
1 celery
1 carrot
1 bay leaf
water (you can use saved water from steaming/boiling veggies)

Place all the ingredients in a medium pot & fill with water until all everything is covered. Bring to a boil and simmer for 1 hr. Turn off, let cool, strain & refrigerate (preferably overnight). When you are ready to eat the soup, remove from the fridge & scoop the solid fat off the top. Heat & serve with crispelle.

Crispelle are very easy-to-make egg pasta. They cook just like crepes but are filled with parmesan & served in chicken soup. We also fill them with ricotta & bake them with tomato sauce for homemade manicotti.

Ingredients for the crispelle:
-this makes about 15
3 eggs
1 1/2 c flour (1/2 whole wheat, 1/2 white is tasty)
pinch salt
water
parmesan cheese

In a bowl sift the dry ingredients. Make a well in the center & add the eggs. Using a whisk & stirring gradually from the center of the well, mix the eggs into the flour. As the batter gets thick, add water and continue until all the flour is combined and the consistency is a little thicker than water. You want these to be very thin, like a thin crepe.


Heat a frying pan on M & spray with non-stick cooking spray. I like to heat two at once to speed up the process. When the pan is preheated, pour in a spoonful of batter and quickly tilt the pan around to spread the batter out and make it as thin and uniform as possible. This does take a bit of practice. If the batter is too thick, it will be hard to spread around the pan, so just add more water before making the next one.

When the edges begin to curl, flip the crispelle over for another minute more. Pour it out of the pan & onto a large plate. Grate parmesan cheese into the pasta and roll it up. Continue until all the batter is used up. Extra crispelle can be stored in the fridge or freezer for later.

Sprinkle with parmesan cheese when you serve & enjoy!


Tuesday, October 25, 2011

Sesame Semolina


Sesame semolina was one of my favorite breads to buy in the store. The combination of seeds & crunchy crust always kept me coming back for another slice. I decided to try making it at home a few years ago and now no store-bought bread can compare.

Ingredients:
2 c warm water
1 T yeast
1 T sugar
1/2 c semolina flour
2 c whole wheat flour + white flour (~3 c)
1 t salt
1/4 c sesame seeds
1 egg

First, start the yeast in 1/2 c water and sugar. When the yeast is foamy, add the rest of the water. Sift the semolina flour, salt, & 1 cup whole wheat flour into the bowl & mix until well-combined. Sift the rest of the flour in, 1 cup at a time, and stir after each addition. When the dough has gathered into a ball and it is difficult to mix more flour in, dump it out onto a floured board.

Knead for 8-10 minutes, until the dough stops taking up more flour, and it has a springy texture. Place back in your  mixing bowl, coat in oil, and cover with a towel. Let rise for 1 hr, until doubled. Punch down the dough a few times while it's rising.

After the first rise pour all but a few tablespoons of the sesame seeds into the bowl, and knead them in.
Dump the dough out & shape into a loaf. I like to make a nice braided loaf. Simply cut the dough into approximately 3 equal pieces, roll each into the same length strip, then braid. Make sure the ends are tucked under.

Preheat the oven to 350 F.

2nd rise; before going in the oven.
Place the shaped dough onto a greased & floured baking sheet & let rise 20-40 minutes, until doubled. You can test when it's done by poking it slightly. If the dough holds the indent, then it's done rising. Be careful about over letting the dough rise too much as it will collapse when you brush with egg.

Finally, brush the dough with egg, sprinkle with the remaining sesame seeds, & bake for 40-45 minutes until golden brown and hollow when tapped on the bottom.

Today I made one very long braided loaf, though I usually make two smaller loaves.

Eggplant Parmesan

If you ever ask me what my favorite food is, I'll probably respond with eggplant parmesan. I have loved it ever since I was a child, and now that I cook by myself, I've made eggplant many different ways. Eggplant parmesan is still my favorite.

Ingredients:
1 eggplant
2 T oil
2 slices or 1/3 c shredded mozzarella or provolone cheese
1/2 c tomato sauce
1/8 c breadcrumbs

Preheat oven to 350 F.

Peel & cut the ends off of the eggplant. Slide it into 1/4'' slices. Heat a frying pan or griddle on M/H with oil. Add the slices of eggplant & saute until soft & browned.

While the eggplant is cooking, spread a layer of tomato sauce on the bottom of your baking dish. The dish can be any size you like, depending on how many eggplants your using and how many layers you want. Begin layering eggplant on top of the tomato sauce. After 2 layers, spread a thin layer of sauce, then continue adding eggplant. On top, spread a thicker layer of sauce & sprinkle with cheese.  Sprinkle with breadcrumbs & cover with aluminum foil.

Bake 30 minutes. If you want the cheese to brown, remove the foil for the last 10 minutes.


Banana Bread

Somehow our kitchen's stock of bananas seemed to triple over the weekend. We went from having a small bunch of 3 bananas to a plateful of a dozen or more. All are past the green stage, and beginning to turn speckled brown. Time to start making food with banana!

This recipe for banana bread is one initially taken from an old version of Better Homes & Gardens Cookbook that my mother made a few changes to. If you look in the cookbook today, the original recipe has been completely revised.

Ingredients:
2 eggs (room temp)
1/3 c butter, melted
1/2 c sugar
1 3/4 c flour (1 c white, 3/4 whole wheat)
*optional 1 T flax
1 t baking powder
1/2 t baking soda
1/2 t salt
1 c mashed banana
*optional 1/2 c chocolate chips
*optional 1/2 c walnuts, chopped

Preheat oven to 350 F. Sift the dry ingredients into a large bowl & set aside. In a smaller bowl, mix together the mashed banana, eggs, melted butter, & sugar until well blended. Make a well in the dry ingredients, pour the others into the well & mix until combined & light. Add chocolate chips & walnuts if using, and mix in a few quick strokes.

Pour into a greased loaf pan & bake 35-45 mins until a toothpick comes out clean. Cool on a wire rack.

In a good oven (i.e. not one in a college apartment), this usually takes the full 45 minutes to bake. When the oven not as dependable, I've had to lower the temperature to 325 as the outside cooked faster than the inside. This is also true if you are baking in a glass loaf pan.


Monday, October 17, 2011

Concord Grape Pie (Oh my!) and other more, traditional, flavors

I write this entry after a short break from my blog. It's not that I haven't been cooking, I just haven't been cooking what I consider "blog-worthy" food. My typical dinner consists of pasta & sauce with salad & veggies. Tonight we had baked grouper with mashed potatoes & brussel sprouts. And for dessert we had a very interesting concord grape pie.

When I was a child my favorite food was cherry pie & to this day it remains a guilty pleasure. Friends of mine know that I love to make pie. During college I made so many pies, I could probably have made one in my sleep if I tried. I'm always on the lookout for new and innovative pie fillings, so when I found this recipe in the Wall Street Journal 2 days ago, I just had to indulge myself.

I did make a few changes to the recipe before I gave it a try, and now that I've tasted the pie, there are some more things I'm going to change for next time.

First, make the filling.

Ingredients:
*5 c concord grapes (I found these at the farmer's market. You can only find them when they're in season.)
**1/4-1/2 c sugar
1/4 c flour
2 t lemon juice
pinch salt

*When I filled the pie crust it was a bit low, so I added some chopped apples to the top. I recommend using 6 cups of grapes.
**I don't like really sweet pies, and usually I add only 1/4 c sugar to my filling. This recipe called for 1 1/4 c & I reduced it to 1/2. I still thought it was too sweet (grapes are sugary), so I'm going to use 1/4 next time.

Wash the grapes & remove the skins, keeping them aside. Place grape pulp in a medium saucepan. Heat the pan on M & bring to a gentle boil, until the grapes become opaque & white. Pour through a food mill to remove the seeds & return to the saucepan. Now, the recipe said to add all of the skins to the pan, but after tasting the pie I found the texture of the skins to be very distracting. Add in 1/2 of the skins, the flour, lemon juice, sugar, & salt, and stir while heating on M. The mixture will thicken and begin to bubble. Remove from heat.

Preheat the oven to 450 F & make the crust. This recipe is enough for a double crust & some leftover for mini pies or small turnovers.

Ingredients:
1 stick of butter--cold
2 cups flour, pastry is best
3/4 t baking powder
pinch salt
water, as needed (~1 cup)

Sift together the dry ingredients into a large bowl. Using a pastry blender, knives, or your hands cut in the butter until it resembles large crumbs. Take a fork & stir while slowly adding water with your non-dominant  hand. Do not add too much water! Once the dough has gathered into a clump, dump it onto a floured surface & divide in half.

Take the larger half of the dough & set aside.

With the smaller half, take a rolling pin & place it in the center of the dough. Gently roll from the center to the edge & repeat. Do not roll back & forth as you don't want to overwork the dough. Make sure the dough is floured enough so it doesn't stick. When it is about the size of the pie dish, fold it in half, then in half again, place in the dish, then unfold. If it doesn't match up perfectly that's fine, just cut around the edges with a knife to remove excess, & use those to patch up any spots where the crust is short.

The larger half will become the top. Roll it out the same as the first layer, but a little larger. You can either make this a solid top & cut slits in it, cut shapes out of it and place those on top (we always did this when I was little and I loved it), or make a lattice top. A lattice top is easy & fun but too difficult to explain here, so you can watch this video if you don't know how to do it.

Pour the filling into the pie & dot with butter. Then place the top onto the pie or weave the lattice.

After the top is on the pie, pinch the edges closed using your thumb, index, & middle fingers going all around the pie. With the excess dough you can roll it out again & make mini pies or simple turnovers by filling with fruit you have available. Sometimes if I don't have fruit I fill them with chocolate ;)

The oven should be preheated when you're done making the pie. It bakes for 10 minutes at 450, then lower the oven to 350 and set a timer for 30-35 minutes. This grape pie took the full 35 minutes and was perfectly golden.

I still haven't made up my mind how I feel about concord grape pie. No doubt it was a delicious success. Yet, it was a lot of work preparing the fruit: individually peeling the grapes & removing the seeds, just to then add the peels back in and think later while I was munching that I shouldn't have added in so many skins. Another thing, the aroma from concord grapes is absolutely intoxicating. It was everywhere, in the fridge, on my hands from peeling, released the second I began cooking the pulp, and later when the pie was baking. At night, my mom came home from work and said it smelled like wine! I think I spent so many hours smelling what I though would be the pie, that by the time I tasted it, it was less-than spectacular.

Next time, I think I might just make jam :)
~~~~~~~~~~~~~~~~~~~~~~~~~~~~~~~~~~~~~~~~~

If you want to make a fruit pie that isn't concord grape here's a recipe for other fruit fillings that can be easily tweaked to compensate for what's in season.

Apple Pie
5 c apples for baking (I like granny smith because they're nice & tart)
1/4-1/2 c sugar
1/4 c flour
cinnamon, to taste
1/2 t nutmeg
1/4 t clove
1/2 t allspice
1 t vanilla

Peel, core, & slice apples into a large bowl. Add sugar, flour, spices & vanilla & stir until apples are evenly coated. I like a lot of cinnamon, but sometimes I add less or none & it brings out flavor of the other spices.

Cherry, Mixed Berry, Apple/Cherry:
5 c fruit
1/4-1/2 c sugar
1/4 c flour
vanilla (optional)

Sunday, October 9, 2011

Pizza

Another family tradition, not only do we make classic Italian thin pizza, but we also cook it on the grill. It bakes fast, and the textures and flavors are unmatched by any oven baking.

This measurements for this recipe are roughly based on how many pizzas you want to make (1 pizza feeds about 1 person). Usually we make more so there are leftovers the next day. It reheats nicely in the toaster oven.

Ingredients:
~1/2 c water per pizza (though 1 1/2 c water is good for 4 pizzas)
1 T yeast for 1 1/2 c water
1-2 T olive oil
1/2 t salt per pizza
whole wheat & white flour

Measure the water, making sure it is warm to the touch & start the yeast in the water. Sometimes, if the yeast is difficult to start, it is best to measure out only 1/2 c warm water first with a sprinkle of sugar & start the yeast, then add the rest of the water later. Whatever you do, make sure the yeast is nice & foamy (5-10 mins waiting) before you being working.

Add the salt & olive oil to the bowl of yeast. Take a good wooden spoon, preferably slotted, and while stirring with your right hand, pour whole wheat flour into the bowl, one scoop at a time. Once the dough has started to combine, begin adding white flour while mixing. (You can mix the proportions of white/wheat if you want, but I've found a nice half/half mix is very good.) Dump the dough onto a floured surface and knead for about 8 minutes, until a springy texture is reached and the dough stops picking up too much flour. Replace back into the bowl and coat in vegetable oil.
Cover with a towel and let sit for min 1 hr to rise. Punch down every 15-30 mins to help the rising process.

When you are ready to make the pizza, prepare your ingredients. Usually I'll make a focaccia (olive oil, salt, & oregano), margherita (cheese, tomato sauce, oregano, fresh basil), peppers, onions, mushrooms, pesto, fresh tomatoes, think of other delicious combinations!

Preheat the grill (see below). Grab a handful of dough and place it on a floured surface. Roll it out with a rolling pin until its very thin. As thin as a couple pieces of paper. If the dough is elastic and keeps pulling in, keep working at it.

Heat the grill so that one side is L & the other side is H. You might have to play around with this depending on your grill, but the aim is to create an oven-effect: Place the pizza on the low side to cook the bottom and the heat from the high side will cook the top. Friends are always skeptical at first, but yes, just place the dough directly on the grill. I usually do a strategic drop, to get it to stay flat while not burning my fingers--it does take some practice so don't get frustrated if it's not perfect your first try. After the dough is on the grill, add the toppings, sauce first, then cheese & others. Err on the side of adding too little toppings rather than loading up the pizza. Everyone I know who tries grill pizza for the first time makes this mistake, and unfortunately if there are too many toppings, the top never cooks through while the bottom might burn. No good. I promise, with thin-crust pizza, less is better :)

After about 2-3 minutes, check the pizza and give it 180 degree turn. I use a pizza paddle, but this can easily be done with tongs or a grill spatula. After 2 minutes more the pizza should be done, when the cheese is bubbling and toasting & the crust is browned. Remove by sliding off using either tongs or a spatula, directly onto a cutting board. Cut & serve.

I try to roll out the next pizza right before I remove the cooking pizza from the grill, that way I can take one off and put the next one on the grill right away.

Simple Vanilla Ice Cream (and other flavors)

Note: This recipe requires an ice cream maker.

I figured since I went all out and posted the Pistachio Ice Cream recipe, I might as well go back to step 1 and post the standard Vanilla recipe. This is the easiest ice cream flavor to make, and can be easily changed to make whatever flavor you desire.

Ingredients:
1 c whole milk
3/4 c sugar
pinch salt
2 c heavy cream
1 T vanilla

Makes 5 c, 10 1/2 c servings.

In a bowl whisk together all the ingredients, beginning with the milk & sugar, then adding the salt, cream, & vanilla. Cover and let sit in the refrigerator 1-2 hrs min, or overnight. When ready, pour in the ice cream maker & enjoy!

Varieties:
Chocolate chip: Add 1/2 c chopped up or grated chocolate bar (this freezes better & has a better flavor than chocolate chips)
Chocolate: Reduce sugar to 1/2 c & vanilla to 1/2 T.  Add 3/4 c sifted cocoa powder & 1/3 c packed dark brown sugar.
Mint chocolate chip: Reduce vanilla to 1 t & add 1 1/2 t peppermint extract. Add 1/2 c chopped up chocolate bar
Fresh strawberry (or other fruit): Add 1 1/2 c fresh or frozen strawberries, pulsed until roughly chopped in a food processor. Reduce vanilla to 1 1/2 t, cream to 1 1/2 c, sugar to 2/3 c, & milk to 3/4 c.
Coffee: Reduce vanilla to 1 t. Add 1 shot espresso.

Pistachio Ice Cream

Note: This recipe requires an ice cream maker.

We purchased our first Krupps ice cream machine when I was in high school & for the first year or so it got a lot of use. My mom made ice cream all the time, in various flavors. After the novelty wore off, the ice cream maker was forgotten (like many specialized appliances), until I took a new interest in it and began making frozen yogurt with fresh fruit. The ice cream machine joined me at my apartment during college and I used it to make frozen yogurt for my friends.

After I returned home, my mom took up her old habit. Unfortunately, the machine was on it's last leg, and eventually the small motor grew too weak to turn the paddle. Shortly after trashing the ice cream maker, I surprised my mom with a new one for Christmas, this one made by Cuisinart. Clearly a lot of improvement has been made in ice cream machinery during the years we owned ours, because the Cuisinart one is vastly superior to the old Krupps (not saying anything about the respective companies).

Here is a recipe for Pistachio ice cream from the Cuisinart Recipe Booklet that came with our machine. When I made it I cut the recipe in half.

Ingredients:
2 1/2 c milk (whole is best)
1 whole vanilla bean, halved & seeds scraped (I just used 1 t vanilla)
2/3 c sugar, divided
2 1/4 c roasted, unsalted pistachios; shelled
2 c heavy cream
pinch salt
6 large egg yolks
1/4 t almond extract

Makes 5 cups, 10 1/2 c servings.

Shell the pistachios & measure out 1 1/2 c. Take the remaining nuts and finely chop. In a medium saucepan over M/L heat combine milk, vanilla bean if using, half the sugar, and 1 1/2 c pistachios. Bring the mixture to a boil & remove from heat. Let steep for 1-2 hrs.

After steeping, add the cream & salt & gradually heat to just a boil over M/L. While this is heating beat together the egg yolks & sugar until it's pale & thick. Once the milk mixture is at a slight boil ladle 1/3 of it into your egg mixture & whisk together. Then ladle 1/3 more into the eggs and whisk again. Return everything to the saucepan and heat gradually until it thickens slightly and coats the back of a wooden spoon, stirring constantly. This should only take a few minutes--don't boil or the yolks will overcook.

Stir in the almond & vanilla extract (if using) and pour the mixture through a fine mesh strainer to remove the nuts & vanilla pod. Let cool to room temperature then refrigerate 1-2 hours min, or overnight.

When you are ready to make the ice cream, pour it into the maker & when almost thickened (~20 mins) pour in the chopped up pistachio nuts. The results are worth all the extra work & waiting overnight (as I did) for the flavors to set. The only changes I made were using vanilla extract (as noted), and we had salted pistachios, so I omitted the salt. There were no noticeable flavor oddities & I will most definitely be making this again.

Super Duper Chocolate Cake

My younger brother is a chocoholic. Naturally, for his birthday each year he gets some version of a deluxe chocolate cake. This year I made him a 2-layer chocolate cake with chocolate icing. I know his first response will probably be, "does it have chocolate chips?" but the richness of these flavors should suffice.

This cake recipe comes from the "Better Homes & Gardens Cookbook" and was recommended by my mom. First make the cake.

Ingredients:
3 eggs (room temperature)
1 1/2 sticks butter, 3/4 c (room temperature)
2 c sugar
2 t vanilla
2 c flour
3/4  t baking powder
1 t baking soda
1/2 t salt
3/4 c cocoa powder
1 1/2 c milk

Preheat the oven to 350 F.
Sift the flour, baking powder, salt, baking soda, & cocoa powder into a bowl. Cream the butter in another bowl. Then add the sugar and blend together. Beat in the eggs one at a time, beating for about a minute after each addition. Then add the vanilla. Now alternate adding in the dry ingredients and milk, mixing slowly after each pour until combined. Once everything is added, mix quickly for 20 seconds to add some air.

Prepare 2 9''x9'' or 8''x8'' pans by lining the bottom with parchment paper/wax paper and coating with nonstick spray. Pour half the batter in each pan & bake 30-35 minutes until a toothpick comes out clean. Remove from the oven & let sit 5 minutes in the pan before flipping onto a wire rack.

While the cake is cooling, make the icing. The icing recipe comes from "The Fannie Farmer Cookbook". This is enough to frost 2 layers of an 8'' x 8'' or 9'' x 9'' cake.

Ingredients:
1 1/2 c sugar
4 T butter
2 squares unsweetened baking chocolate*
1/4 t salt
1/2 c milk
1 t vanilla
*1 square unsweetened baking chocolate = 1 T butter + 3 T cocoa powder

Combine all ingredients, except vanilla, in a heavy-bottomed pan and heat until the mixture starts to simmer. Stir constantly for 1 minute then let cool. After it is cooled, add the vanilla & whip either by hand or with a mixer until light & fluffy. Ice the cake & serve.

RESULT:
Very delicious, BUT the icing was definitely NOT what anyone would call traditional "frosting". It was more like chocolate sauce. It never solidified, and though I thought it gained a bit of volume after whipping a long time in the mixer, as soon as I turned off the mixer, everything collapsed into a runny chocolate mess. So my cake quickly became two layers oozing with chocolate goo. Though this was supposed to "frost" a 9'' x 9'' cake, there was definitely plenty left over. My brother celebrated the fact that even when refrigerated, this icing did not freeze, making it the perfect fudge sauce for ice cream. Phew, at least it's not a total loss!
The icing was so runny, it almost dripped off the plate!


Needless to say, the cake came out perfectly (I've never made this recipe before), it was incredibly moist, and super chocolatey. The very runny icing complemented the cake nicely, and the flavors just melted on the tongue.


Saturday, October 8, 2011

Risotto alla Milanese

My family has been making this risotto dish since we lived in Milan. The recipe was given to us by our favorite restaurant shortly before we moved away. I have many fond memories of that restaurant & of course, eating their Risotto alla Milanese.

Ingredients:
1 1/2 c Arborio rice
1/2 c dry white wine (I used red today, it gives the rice a different color)
2 c stock plus boiled water
2 T olive oil
1/4 c finely chopped onion
1 pinch saffron threads OR 1 packet saffron powder
2 T parsley, chopped
salt & pepper, to taste
1/2 c grated parmesan cheese

In a medium pot heat the olive oil on M and saute the onion. When the onion is clear, add in the rice & wine & let the alcohol cook out for 20 seconds. Then add the stock, reduce heat to M/L, & set a timer for 25 minutes. Add in the parsley & saffron. Stir frequently & add boiled water whenever needed. The more you stir, the creamier the rice will be. When there is 5 minutes left on the time. add in salt, pepper, & the grated parmesan. Taste to make sure the rice is cooked through, it may take more or less time.

This was my first time adding parsley to the recipe & I also used red wine instead of white. It came out superbly and very creamy. When in doubt, keep stirring! I served it with some steamed asparagus & salad.

Thursday, October 6, 2011

Yogurt Cake

This recipe comes from my friend Loïc. It is a recipe from his childhood & uses a single serving yogurt cup to measure all the other ingredients. Very fun!

To make a larger cake, use a larger cup of yogurt & visa versa.


Ingredients:
1 c yogurt
2-3 eggs (depends on size of cup)
1 1/2 c sugar
1/2 c melted butter
vanilla, as you prefer (~1 t)
2 c flour
1 1/2 t baking powder
*optional 1/3 c cocoa powder


Preheat oven to 350F and grease & flour a pan--bundt, cupcake, 9''x9'', loaf.


When Loïc made this, he just made a plain cake, but since then I've tried adding cocoa to it to make a chocolate cake. It's good and not too sweet since I don't add any extra sugar. If you want something sweeter you can add more sugar, or add icing.


Today I decided to make a marble cake, so I'm using half the cocoa powder.

In a larger bowl whisk together the eggs, yogurt, sugar, vanilla & melted butter. Measuring melted butter in a (usually plastic) yogurt cup isn't very desirable, so I've found that 4 T butter is about 1/2 c. (This does depend on the size of your cup).


In a second bowl sift the flour & baking powder together. Then add to the first mixture until combined. Split the batter in half & add 1/6 c cocoa powder (2 heaping T) to one half & mix. Alternate adding chocolate & vanilla to the prepared pan.

This cake can be baked in any size pan for 45 minutes or more, until a toothpick comes out clean. Today I made it in a loaf pan and it took 1 hr 10 minutes. I probably should have lowered the oven to 325F, though I liked the crisp outside. Lower the pan to 325F if you're making cupcakes & they should bake in about 18-20 minutes.

Overall the cake was very good. This is my first time making it in a loaf pan & it did take a long time. Perhaps it would have been good with 5 minutes less though, or like I said before a lower oven temp. I used Greek Yogurt because we had it in our fridge and nobody was eating it. As a result, the batter was very thick. This didn't change the result of cake, but one way to solve this issue would be to add a bit of buttermilk or sour milk.


Monday, October 3, 2011

Irish Soda Bread/Brown Bread

I decided to make Irish soda bread after I returned from a trip to Europe that ended in Ireland. I tasted soda bread several times in Ireland and the flavor was unlike any bread I had before. Even my last meal in the airport--porridge and soda bread--was delicious and very distinct from anything I could get in the U.S. When I arrived home I was determined to replicate the soda bread flavor as best I could, and I did quite a bit of research to find the perfect recipe.

I found this recipe online at http://www.sodabread.info/. They stress that traditional Irish soda bread is made with only flour, baking soda, salt, & buttermilk/sour milk.

There are also two variations: traditional (all white flour) or brown bread (some whole wheat and some white). Both methods of preparation and baking are the same. Today I made brown bread.

Ingredients for Brown Bread:
3 c wheat flour & 1 c white flour
1 1/2 t baking soda
1 t salt
14 oz buttermilk


Ingredients for Soda Bread:
4 c white flour
1 t baking soda
1 t salt
14 oz buttermilk

Preheat oven to 425 F. Grease & flour a 9'' round cake pan or dutch oven.

Sift all dry ingredients into a bowl and slowly add the buttermilk while mixing with a spoon. When combined into a dough, pour onto a floured surface, knead lightly, & press down into 1'' round.

Place into prepared pan and cut a large X in the top. Bake 30 mins with a cover on top, then 15 minutes uncovered. Remove from oven and cover with a towel to keep fresh.

The X on top is traditional and also so the bread can be broken into 4 pieces when served.

Oops, as I re-read the recipe to type it up here, I noticed that I added baking powder instead of baking soda. I don't think it will make much difference but I'll make a note once I taste the bread later.

UPDATE:
The bread came out of the oven, and it was kind of flat. It rose a little, but not as much as I would have liked. I blame this on two things: mistaking baking powder for baking soda and kneading. Kneading is very important and definitely a learned skill. I've made many an "okay" bread due to poor kneading, not enough kneading, (or in this case) over-kneading! Usually the bread will taste okay, but the texture will be ruined if you don't knead the bread correctly. So all I can say is practice, & follow the directions carefully.
I got a little ahead of myself & just dumped the dough out onto the board & started kneading, before I went back and re-read the directions which said "knead lightly". By then I was already past the point of no-return. I also selected a bowl that was too small for my ingredients, so I had trouble combining them all properly in the bowl, and used the kneading to properly get them to form together.

Next time I think I'll try using a method similar to how I make biscuits: combine the ingredients completely with a fork. Dump onto a floured surface & lightly fold the dough over and shape into a circle. Not much kneading involved and very delicate handling of the dough in general.

Saturday, October 1, 2011

Pesto with Arugula

It's time to harvest all of our fresh basil--which means it's also time to make fresh pesto. I added arugula to the pesto to give it a slight variation of flavor, and substituted walnuts for pine nuts since that's what we had.

Ingredients:
2 c fresh basil
1 c arugula
2 cloves garlic, peeled
1/2 c grated parmesan cheese
1/2 c olive oil
1/4 c pine nuts
pinch salt & a sprinkle of pepper

Combine all ingredients except the olive oil in a food processor. Turn on the machine & slowly pour the olive oil in the top. Scrape the sides if needed and continue combining until evenly blended. Serve over pasta, pizza, anything you like! Makes about 1 cup. Can be stored in the fridge for a few days.


Ricotta Gnocchi with Bolognese Sauce

In this version of ricotta gnocchi, I used some ricotta and some potato, instead of most recipes which substitute ricotta for all of the potato. I decided to make a meaty Bolognese sauce instead of just plain tomato, as it complements the flavor of the gnocchi nicely.

I usually buy about 2 lbs potatoes for 1 recipe of gnocchi. Since we're substituting some ricotta for 1 potato it's easiest to weigh out 2 lbs potatoes at the store then remove one.

First make the sauce. While that's cooking, make the gnocchi.

Ingredients for the Sauce:
2 T olive oil
1 carrot
1 stalk celery
1/2 large onion
4 oz fresh mushrooms
2 cloves garlic
1/4 c wine
10 leaves fresh basil
1 bay leaf
1 T parsley, dried, or more, fresh
1 t thyme, dried, or more, fresh
1 lb ground beef
1 28 oz can tomatoes
salt & pepper to taste

In a large saucepan, heat olive oil on M/H. Finely shop carrot, celery, onion & add to pan. Mince garlic & add. Chop the mushrooms and add those after a few minutes. When the onions are getting clear, pour in the wine and stir for 20 seconds, until the alcohol has boiled off. Add ground beef, breaking into small pieces as you go. Season with salt & pepper. After a few minutes, pour in your tomatoes & herbs, lower heat--I put mine on as low as it would go--and simmer for 1 hr, stirring occasionally.

Ingredients for the Gnocchi:
7 oz ricotta (about 1/2 a 15 oz container. If you want to substitute for 2 potatoes, use the whole container)
3 large baking potatoes (or about 1 1/2-1 3/4 lbs)
1 egg
1/2 t salt
flour

Wash the potatoes & boil them whole in salted water. Do not cut them, otherwise they become waterlogged and the gnocchi will not be light and fluffy. Make sure they cook all the way through and a fork goes in easily.

Drain the potatoes and peel when easy to handle (I'm usually impatient and do this right away, despite burning my fingers a bit). Push each potato through a ricer into a large bowl. If you don't have a ricer, you can also use a regular potato masher, but you won't get the same amount of airiness in your dough. Try to remove as many lumps as possible, if using the masher. Cover the potatoes with a towel and set aside to cool.

Once the potatoes are cool enough that cracking an egg into them won't cook the egg, go ahead and add the egg to the bowl.  (I remember this always confused me when I was a kid: "Potatoes cooking an egg, I don't understand!"). Sprinkle in the 1/2 t salt, and add in the ricotta. With a fork, mix everything together, being careful not to smash the potatoes too much; we're not making mashed potatoes, we're trying to keep it the consistency of a light dough.

Once the ricotta and potatoes are evenly distributed, begin sprinkling flour over the mixture, while still mixing with the fork. It will get harder to mix as you add more flour. Stop adding flour when the mixture has formed a dough and it is only slightly sticky to the touch. (If in doubt, err on the side of adding too little flour, than adding too much.)

Gather the dough into a ball, and dump onto a floured working surface. Knead until the stickiness is gone and the dough is workable, adding flour as needed. This only takes about a minute. Roll into a log, then slice into thick 1'' slices. Sprinkle more flour on your work surface, then roll each slice into a long snake, about 1/2'' in diameter. Cut each snake into 3/4'' angled pieces and roll in extra flour, before placing on a floured baking pan. Do this for each of the slices of dough, until all of them are cut into gnocchi, floured, and on the pan. Boil water and cook the same day.

When cooking gnocchi, use a wide-brimmed pot and only place enough in to cover the bottom layer. They will cook in about 1-2 minutes. Stir them around, as they might stick to the bottom. As soon as they float to the top of the water, fish them out using a large strainer or slotted spoon.

When I finished making the gnocchi, my sauce had about 15 minutes left to cook. I set a pot of water to boil, and when the timer for the sauce was done, my gnocchi were just done cooking. I couldn't have asked for better timing!

Next time I think I'll either cut the meat in half or double the tomatoes and veggies, to make the sauce more "saucey", but as of now I'm satisfied because I was craving something really meaty tonight and that's exactly what I got.

Tuesday, September 27, 2011

Hummus

Homemade hummus is easy, fast, and super yummy! It's also impossible to go wrong, and you can vary the ingredients any way you like depending on the flavor you want.

Today I made a traditional hummus with a few added spices.

Ingredients:
1 can chickpeas (or you can buy beans and soak them overnight)
1/4 c water from chickpeas
2 T olive oil
Juice of 1 small lemon
1-3 T tahini
1-2 cloves fresh garlic
1/2 t salt
pepper, to taste

Optional:
cumin & paprika, to taste
roasted red pepper
roasted garlic

Because hummus is very personal (I find), all the ingredients are estimates. I usually just toss in a little bit of everything without measuring and taste as I go until I like the flavor.

It's best to make hummus in some type of food processor or blender, although I have a friend who makes it by hand with a potato masher and hers was delicious.

Combine all ingredients in the food processor except the water, being conservative at first (maybe half the lemon juice, 1 T tahini, 1 clove garlic). As it's mixing, add the water slowly until desired consistency is reached. Taste and add more ingredients until you're satisfied with the flavor.

If you're making roasted red pepper/roasted garlic, before you make the hummus preheat your oven to 400 F. Take an entire head of garlic and slice off about 1/4'' on top so most of the cloves are exposed. Drizzled olive oil over the cloves so it soaks inside and sprinkle with seasoning/spices if desired. Wrap in aluminum foil and place on a baking tray with the red pepper. Bake for 20-30 minutes, turning the pepper until the skin is blackened on all sides. Remove from oven & remove the pepper skin when it's cool enough to handle. Save as much juice as possible and add this to the hummus with your pepper. The garlic will be easy to remove from its skin as well and extra can be stored in the fridge.

Monday, September 26, 2011

Multigrain Seeded Bread (German Brown Bread)

I found this recipe online one day when I was craving a hearty multigrain/whole wheat bread. Something tasty and full of flavor but not so dense that every bite weighs you down. In the reviews, someone said it tasted like authentic German seeded bread. After making it once & having been to Germany and eaten their delicious dark bread, I agree. Thus, my name for this bread is: German Brown Bread.

Here is the original recipe, from allrecipes.com

The great thing about this recipe is there is a lot of room for improvisation. Not only with the ingredients, but also in the method. I like making bread by hand because it's fun, but this can easily be made in a bread machine. Also, I made some changes to the method listed in the recipe (mostly because it didn't make too much sense). I'm going to tell you how I did it here, to see the original, just click the link above.

Ingredients:
1 package yeast
1 1/2 c whole wheat flour
3/4 c white flour
1/2 t salt
2 T molasses
1 c water
1 egg white
3 T sunflower seeds
3 T pumpkin seeds
3 T sesame seeds
1/3 c rolled oats (steel cut oats also work)
1 T milk

In a small pan, mix together the water and molasses and heat until the water starts to steam. I usually stick my finger in to test the warmth, or you can use a thermometer--about 120 F. If it is too hot to hold your finger in for a few seconds, then it is too hot to start the yeast. If the water is the right temperature, pour into a large bowl and add the yeast & salt. Set aside until it's foamy, about 5-10 mins.

Meanwhile, sift your flours into a bowl & separate your egg white. You can substitute anything you like for flour here. Usually I'll put in oat flour for some of the white flour, and bran & flax for some of the wheat. When the yeast is ready, pour some of the flour into the bowl and mix. Then add the egg, then the rest of the flour. If the dough is too dry to mix with a spoon, pour out onto a floured surface and start kneading. If you need to add more flour, do that and then begin kneading.

Knead the dough for 10 minutes. Place back into the bowl, coat with vegetable oil, and cover with a towel.

Let rise 2 hours. While rising, punch down every 15-30 mins. The more you punch it down the more the dough rises.

Now is the fun part! Uncover the bread and bring it back to your workspace. Mix together the seeds & oats & sprinkle all except 2 T into the bread bowl. (The 2 T will be for sprinkling on top later). Knead the seeds into the dough until combined. Empty onto a floured surface and shape into a loaf. Place into a greased loaf pan, cover, and let rise 1 hr.

Preheat oven to 350 F. Brush with milk and sprinkle with remaining seeds. Bake 30 minutes. Test to see if the bread is done by turning it out of the pan and tapping on the bottom. If it sounds hollow it's done. Let cool before serving.

The tanginess from the molasses & crunch of the seeds result in a very satisfying flavor & texture combination. Mmm, great with dinner and it will be even better for breakfast tomorrow morning.

Baking Powder Biscuits

Biscuits were the first recipe I ever made by myself and they are easily the recipe I have made the most times in my life. They only have 5 ingredients, are easy and fun to make, and I have the recipe memorized, so I've made them many times while traveling or staying with friends.

In New Zealand I used to call these "American Biscuits" since their cookies are biscuits.

Ingredients:
5 1/3 T butter (1/3 c)
2 c flour (I like to do 1/2 whole wheat 1/2 white)
3 t baking powder
1/2 t salt
3/4 c milk

If you would like to add some variation to your biscuits, you can also add in fresh fruit like blueberries, peaches, plums, or sprinkle with cinnamon/sugar.

Preheat oven to 450 F.

Prepare your dry ingredients before you remove the butter from the fridge. The colder it is while you work, the better they come out. Sift the flour, salt, & baking powder into a bowl. Then add the butter & cut it in quickly. I used to use my hands to mix it in until it was a crumb-like texture, but this warms up the butter. I now have a handy little tool for cutting-in butter that also works well for pies. Hands work just fine though, plus its more fun :)
 
After your butter is mixed in, grab a fork in your right hand and the 3/4 c milk in your left hand. Pour the milk in the bowl while you stir with the fork. Stop stirring when everything is combined into a clump and there are barely-to-no crumbs left. You want the dough to be wet to the touch & stick to your finger.

At this point you have two options.
1: Drop biscuits, where you simply remove clumps of dough and drop them onto an ungreased sheet pan. Make sure you flour your hands so the dough doesn't stick and make a mess.

2 (I usually do it this way): Dump out onto a floured surface and press down to about 1/4'' thick. Here you can add anything you like--blueberries, other fruit, cinnamon sugar--then fold in half and press down again. Do this about 4 or 5 times, adding toppings each time. Make sure you save some to sprinkle on top. When you're done, only press it down to about 1/2'' and cut into pieces. Makes 10-12 pieces. Place on ungreased baking sheet & poke with a fork.

Bake 8-10 minutes.

When I made them this morning I made half with cinnamon sugar & half with fresh plum. I had to use Sea Salt instead of regular table salt and they came out incredibly salty. I found it very distracting, though others who ate them didn't mind at all.

Thursday, September 22, 2011

Fruit Cobbler

Today I found myself aimlessly wandering around the kitchen, opening and reopening the fridge and cabinets looking for food that was nowhere to be found. Clearly this excess of energy and lack of food must be resolved by baking something!

Four nectarines had sadly been confined to the fridge fruit bin, after sitting on the kitchen table for days, ripening to perfection, but still lacking any flavor whatsover. They were asking to be made into a delicious dessert. I decided to make a cobbler, since I've made quite a few pies in the past week or so and it's been months (or maybe even a year) since I've made cobbler.

Cobbler can be baked with either the fruit on the bottom or on top, but it is always served with the fruit on top. I prefer making it with the fruit on the bottom, that way the fruit is moist and juicy while the crust is crunchy and browned, but still fluffy.

I decided to use the recipe from the Joy of Cooking, I don't think I've ever made their cobbler before. It also uses the book's "Fluffy Biscuit/Shortcake" recipe as the pastry topping, which I tried insetad of my own biscuit recipe.

Ingredients:
First make the pastry:
1 short c flour
1/2 t salt
2 t baking powder
1/2 T sugar
3 T butter
3/8 c milk

In a bowl, sift dry ingredients then cut in the butter. (When making pastry, make sure the butter is taken directly out of the fridge and still cold.) Add in the milk, and mix with a fork until combined and few crumbs remain. Set aside. NOTE: When I made this, I didn't flip back to the cobbler page and started kneading the dough. I ended up kneaded it into an 8''x8'' square to make a fit topping for the cobbler. If you'd rather do this, flour your surface, and very gently fold over the dough several times and press down until it has about 6-8 layers.

When the dough is ready, preheat the oven to 425 F and grease an 8''x8'' square pan. Start making the fruit filling by peeling your fruit and removing pits/seeds.

Fruit Filling:
3 c fruit (I used nectarines and a couple small plums)
1/3 c sugar, or more depending on sweetness of fruit
1 T flour
cinnamon & nutmeg to taste
2 T butter

Combine fruit, sugar, & flour into a heavy-bottomed saucepan. Heat on M until the fruit starts bubbling, stirring regularly. Once it smells good and the sauce has thickened (about 5 minutes), remove from heat and pour into prepared pan. Sprinkle with cinnamon & nutmeg and dot with butter. Cover with pastry. If made into an 8''x8'' sheet like I did, this can be carefully placed on top as with pie dough--fold in half, move to the dish, then unfold. If you left your pastry in the bowl, you can pull off clumps of it and drop them on top of the fruit, similar to drop biscuits, and you'll get a nice texture when it bakes.

Bake 30 mins & serve warm with vanilla ice cream or whipped cream (or both).
I let the cobbler sit for a few hours before eating, but it was still a little warm when I served it. The fruit held together nicely and was not too sweet. The pastry topping balanced the filling perfectly and was not too buttery. I wish I had some ice cream to eat with it!

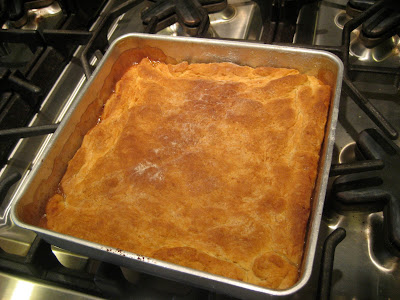
Right out of the oven

Corn Bread

A nice accompaniment to any meal, corn bread also makes a delicious snack. Unlike most breads, I like to eat it immediately after it comes out of the oven, while its still steaming. Tonight I made it as a side dish with dinner--vegetable soup, salad, & corn bread--yum!

Choosing a good bread recipe is more difficult than one may think. The first time I made corn bread, I found one called "Grandma's Corn Bread", thinking this would be delicious. It took forever to bake, and was still soggy on the inside when the outside was brown and crispy. It was also incredibly buttery. Sorry Grandma, but this recipe was just okay.

This time, I pulled out my favorite bread book, "Bread Winners" by Mel London. It's an ancient text, with yellowing pages and a torn cover, but the recipes it holds have yet to disappoint. My goal is to try everything in this book at least once.

The index listed several recipes, including: Sour Milk Corn Bread, Texas Corn Bread, Sourdough Corn Bread, Buttermilk Corn Bread, Extra Corny Bread, and 2 for just plain Corn Bread. I glanced at the ingredients list for Texas Corn Bread (which I had bookmarked previously), and the plain Corn Breads. I settled on making the following corn bread recipe because it called for plain milk instead of buttermilk (which I did not have), and had less sugar than the other recipes.

Ingredients
1 c flour
1 c yellow cornmeal
2 t baking powder
3/4 t salt
1 1/8 c milk
2 eggs
4 T melted butter
3 t honey

Preheat oven to 425 F & grease 12 muffin tins. Alternatively, you can bake in an 8''x8'' square pan, but it will take a few minutes longer.

Sift dry ingredients into a bowl & make a well in the center. In a separate bowl, combine the milk, melted butter, honey, and eggs, slightly beaten. Pour your liquids into the well in the dry ingredients and mix together to combine. Do not overmix. Pour into prepared muffin tins and bake for 18 minutes.

The recipe says to bake 20-25 minutes, but mine came out a bit crispy. I'm not sure why, but 18 minutes seems to be the secret number with muffins or cupcakes. That being said, the cornbread was still moist and delicious--unlike past attempts--and my whole family was pleased with the result. I wouldn't change anything about it, there was a perfect balance of sweet, salty, and buttery, and I will definitely be making these again.

Monday, September 19, 2011

Beef Stroganoff

The other night we went out to a Russian restaurant for dinner. While debating whether to order Chicken Kiev, Beef Stroganoff, or Lasagna made with filo dough, the waitress came over and offered, "In my opinion I wouldn't get the beef stroganoff, because it's easy to make at home". Her response settled our debate over dinner, but the next night my sister-in-law had a great idea: let's make beef stroganoff!

She pulled out "Please to the Table: The Russian Cookbook" and found the recipe for beef stroganoff. We made a half recipe, enough for the 3 of us plus leftovers.
Ingredients (halved):
1lb  filet mignon, cut into thin strips*
1 1/2 T butter
3/8 c finely chopped onion
1/2 lb fresh white mushrooms, cut in half
2 tsp flour
1/6 c beef stock
1/6 c heavy or whipping cream
1/4 c sour cream
1 tsp Dijon mustard
1 1/2 tsp chopped fresh dill
1 1/2 tsp chopped fresh parsley
salt & pepper to taste

* The author suggests cutting the steak into thin strips and searing in a pan 3-4 mins. Instead, we kept the pieces whole and grilled them. After letting the steak rest, we cut it into thin strips. Make sure you save the liquid from the meat, to add later.

After cooking the meat, melt the butter in a skillet over M heat. Saute the onion until tender/translucent. Increase to M/H heat and add mushrooms. Cook until well done & browned, the book suggests 20 mins.

Lower the heat to M/L, sprinkle in the flour and stir for 1 min.

Next, the directions say to add in the stock, heavy cream, mustard, & meat juices. Make sure the pan is on L & not too hot. When we added our liquids they instantly bubbled away and we had to add more. Simmer for 5 minutes until the sauce thickens--don't boil.

Finally, return the meat to the pan, coat with the sauce, and add in your herbs and spices to taste. We added more dill & parsley than the recipe called for.

Beef stroganoff can be served over pasta, mashed potatoes, or rice. We decided to serve ours over mashed potatoes, which worked out well because it wasn't incredibly saucey like when it's served in restaurants. Next time I'll add more stock and make sure the heat is lower when I add the liquids.